3 min read
How To Create Fields on Purchase Order in NetSuite
Learn what types of custom fields you can add to PO in NetSuite and how to create and apply them to the transaction form.
Oracle NetSuite is one of the best ERP solutions out in the market.
It provides various customization options to suit its users' business needs.
Still, sometimes things can be tricky when it comes to using all that functionality that NetSuite offers.
Keep reading to learn what custom fields you can add to PO in NetSuite and how to create and apply them to the transaction form.
Types of Custom Fields You Can Add to PO in NetSuite
NetSuite offers 3 different types of custom transaction fields that you can add to a Purchase Order form:
- Custom Transaction Body Fields
- Custom Transaction Line Fields
- Custom Transaction Column Fields
A custom field that you can add to the body of transaction records like purchase and sales transactions, expense reports, item fulfillments, etc.
Used to add fields to the columns of each transaction record, such as purchase items and expense items.
A field that displays line-item columns of transaction records such as sales, purchase, opportunity, and expense items.
All these custom fields are available both in standard and custom PO forms.
How To Create Fields on Purchase Order in NetSuite?
To create a transaction custom field, follow this guideline:
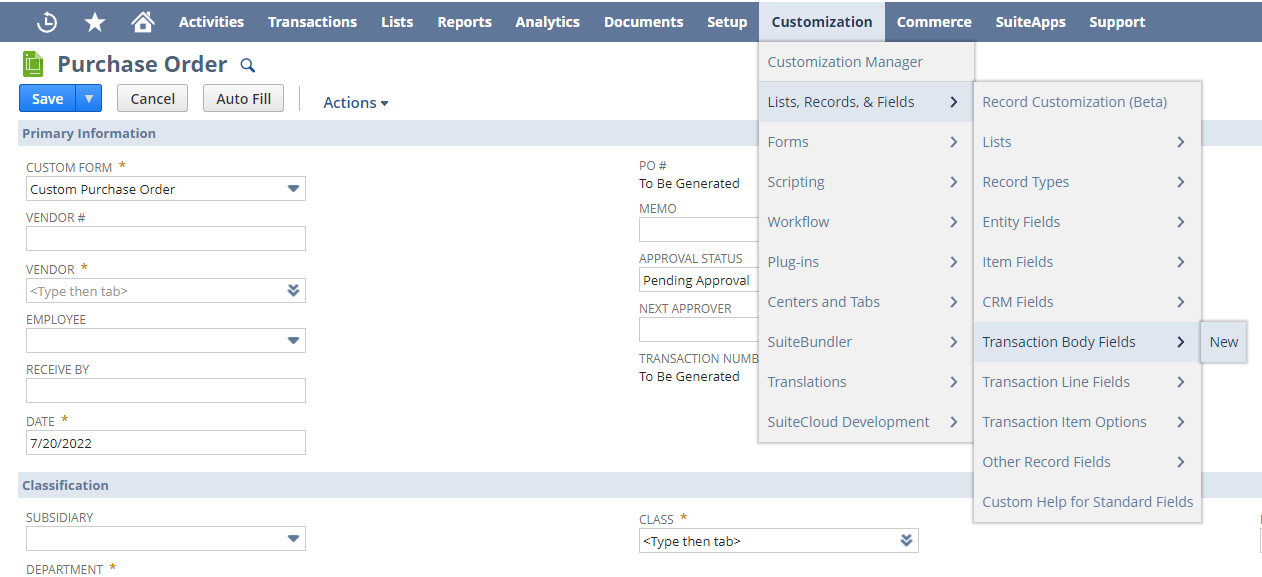
1) Open the Custom Field Tab
Click on Customization > Lists, Records, & Fields > New, where [Custom Fields] is the field you want to create.
2) Fill in the Custom Field Information
On the Custom Field screen, fill in the information you want your custom field to have, such as name, description, type, etc.
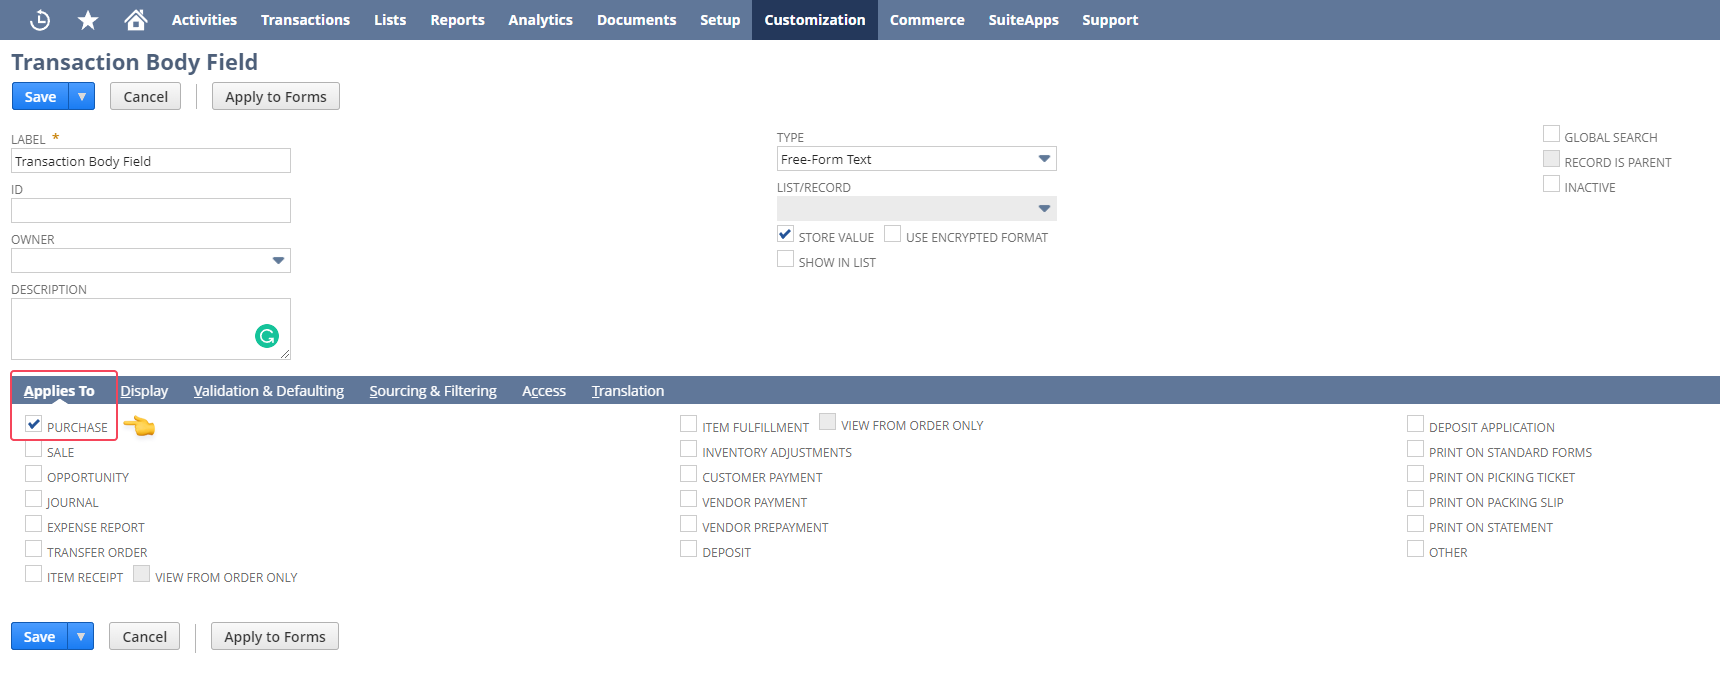
3) Assign a Custom Field to a PO
To apply a custom field to the purchase order record type, click the Applies To > Purchase on the custom field setup page.
4) Set the Display Options
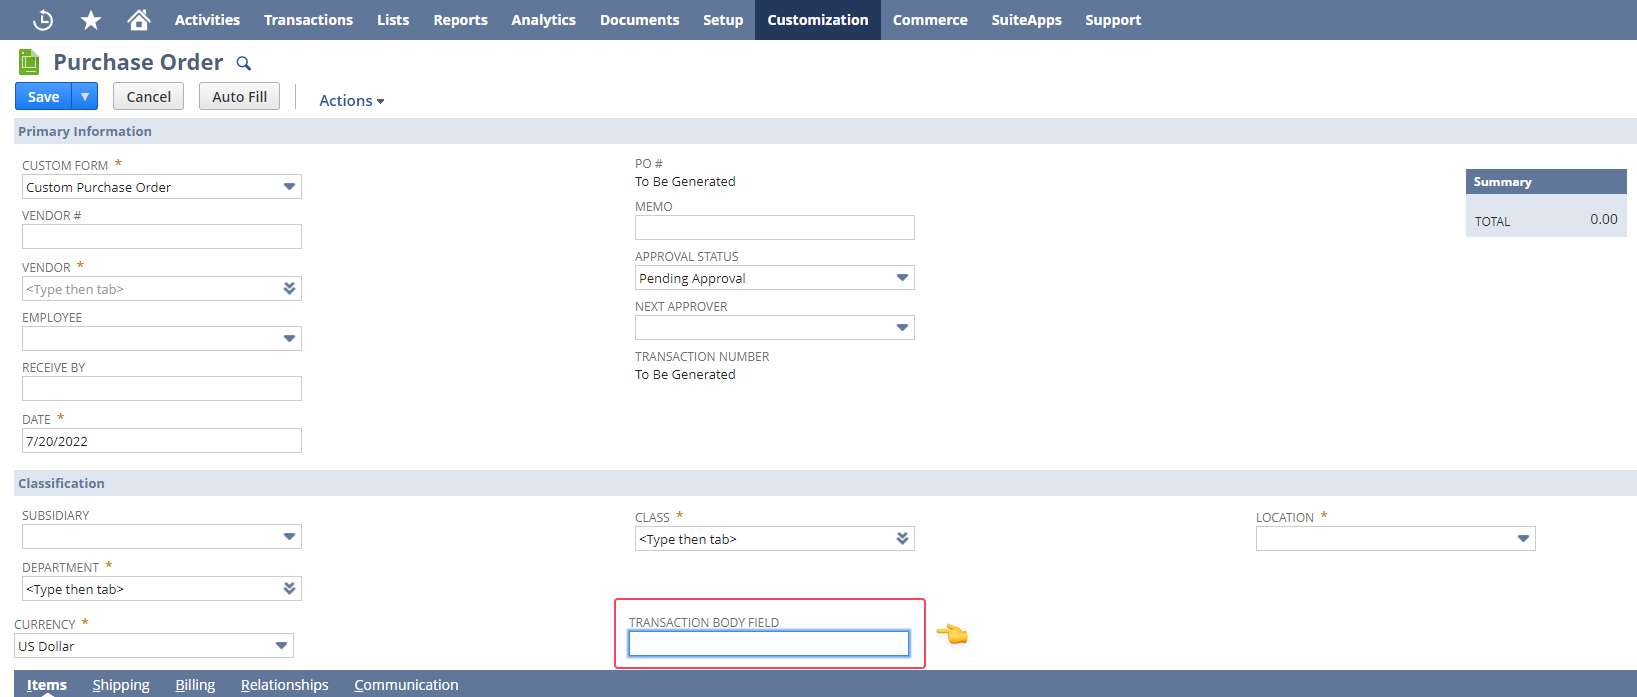
On the Display subtab, you can choose where you want your custom field to be located. Select where to place it on PO in the Insert Before field.
In the Subtab field, choose the subtab on which you want the field to be displayed.
For example, select Main if you want the field to display in the top portion of the record.
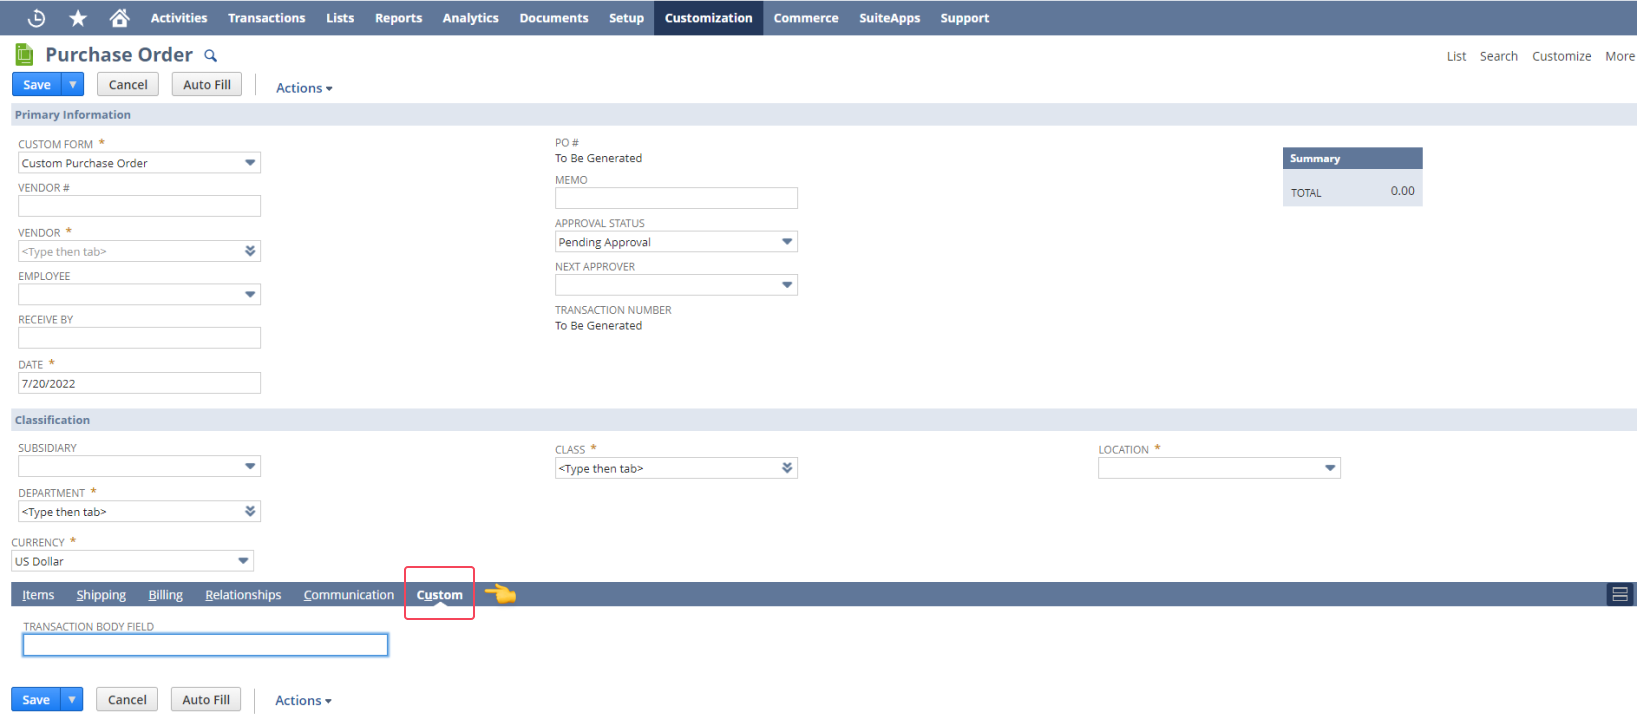
Note: If a subtab is not selected, the field is automatically displayed on a Custom subtab for the PO.

5) Apply the Field to a PO
Click Save & Apply to Forms to save the changes. After that, you'll be redirected to a list of forms to which you can apply this custom field.
Select the Purchase Order and click the Save button. The custom field will be available in purchase orders according to the chosen display options.
Note: After assigning the field to the purchase record type, it's automatically available as a possible field when creating a standard and custom PO.
How To Edit Fields on Purchase Order in NetSuite?
- Press the Customization > Lists, Records, & Fields, where [Custom Fields] is the type of custom field you want to modify.
- Click on the custom field you want to change.
- Make the necessary changes.
- Save.
Precoro to NetSuite Integration: Get a Handle on Purchasing
Do you want the best purchasing and spend management experience across all your business units?
Precoro and NetSuite direct integration is already available for you to make that wish come true.
Why it's beneficial:
- Take the best out of two systems to ensure that all your procurement needs are fully covered.
- Manage orders, approvals, and invoices in Precoro and automatically sync all the data with NetSuite.
- Revise the documents and have them automatically updated in NetSuite.
- Synchronize your catalogs and vendors between Precoro and NetSuite.
Want to know more about Precoro to NetSuite Integration can streamline your purchasing and accounts payable process?
Schedule a free demo, and we'll gladly answer all your questions.


