6 min read
Product Update, April 2023
Discover the latest updates to Precoro, including improved integrations, a fresh design, and new supplier management features - all for smoother daily operations.
Update multiple items at once in invoices
In the previous product update, we introduced the ability to update multiple items simultaneously in purchase orders, purchase requisitions, expenses, and requests for proposals. Now it’s also possible to do so in invoices.
This feature is particularly useful in scenarios when:
- Item prices have changed
- You need to apply specific discounts or taxes to multiple items at once
- You want to delete some items or add new ones
- You need to update information in the Custom Fields for Items
💡 Please note that you can only make updates to items when invoices have either Draft or In Revision statuses.
To update items, simply follow these steps:
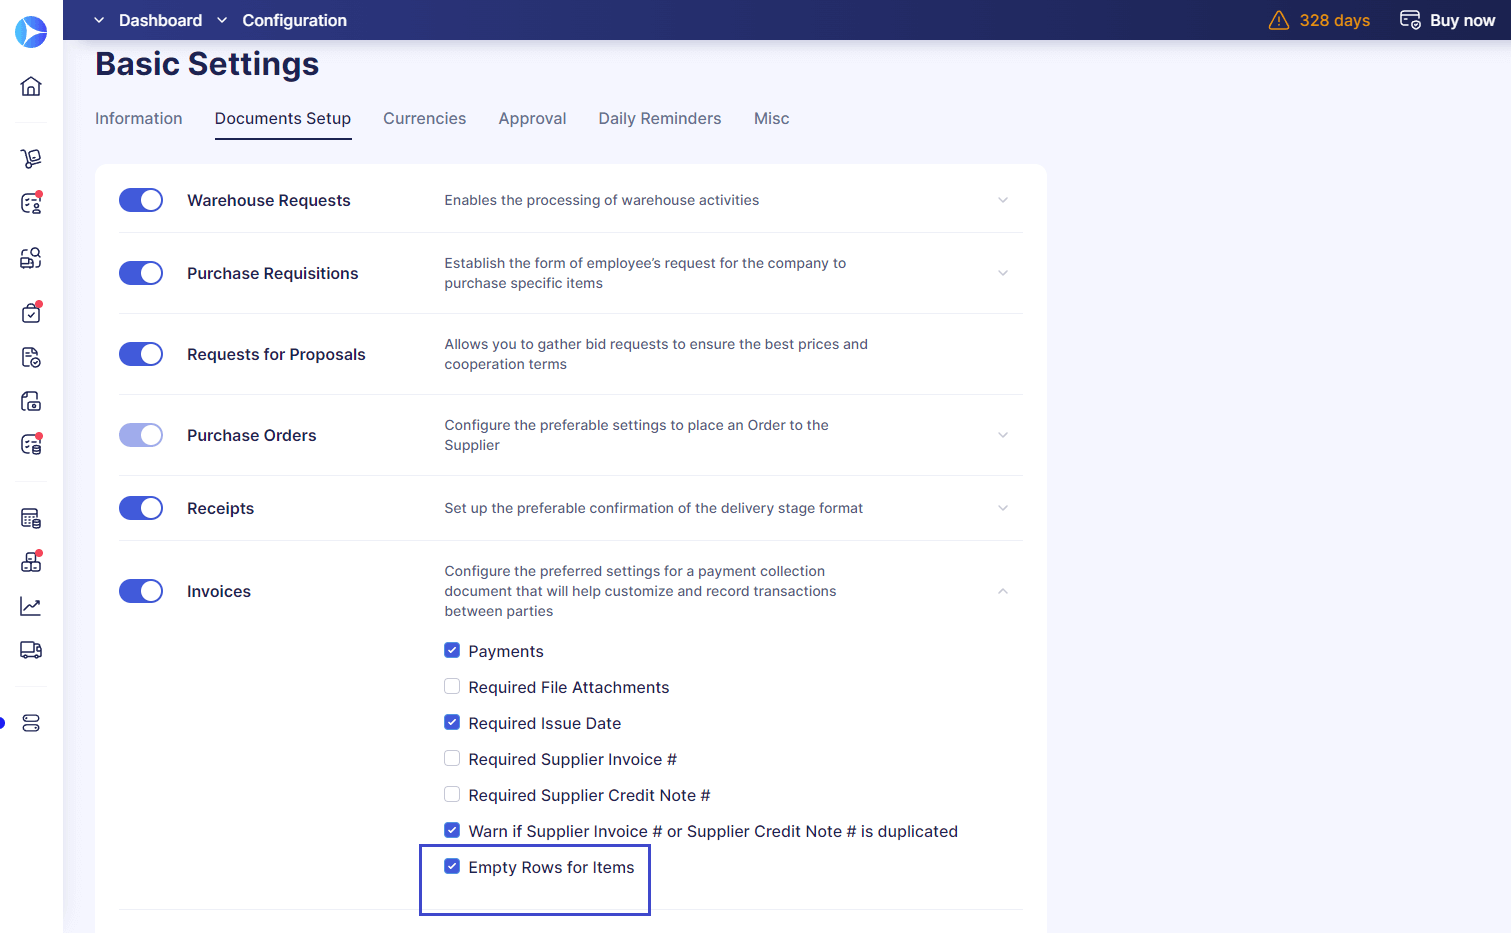
- Go to Basic Settings → Documents Setup → Invoices and activate the Empty Rows for Items checkbox.
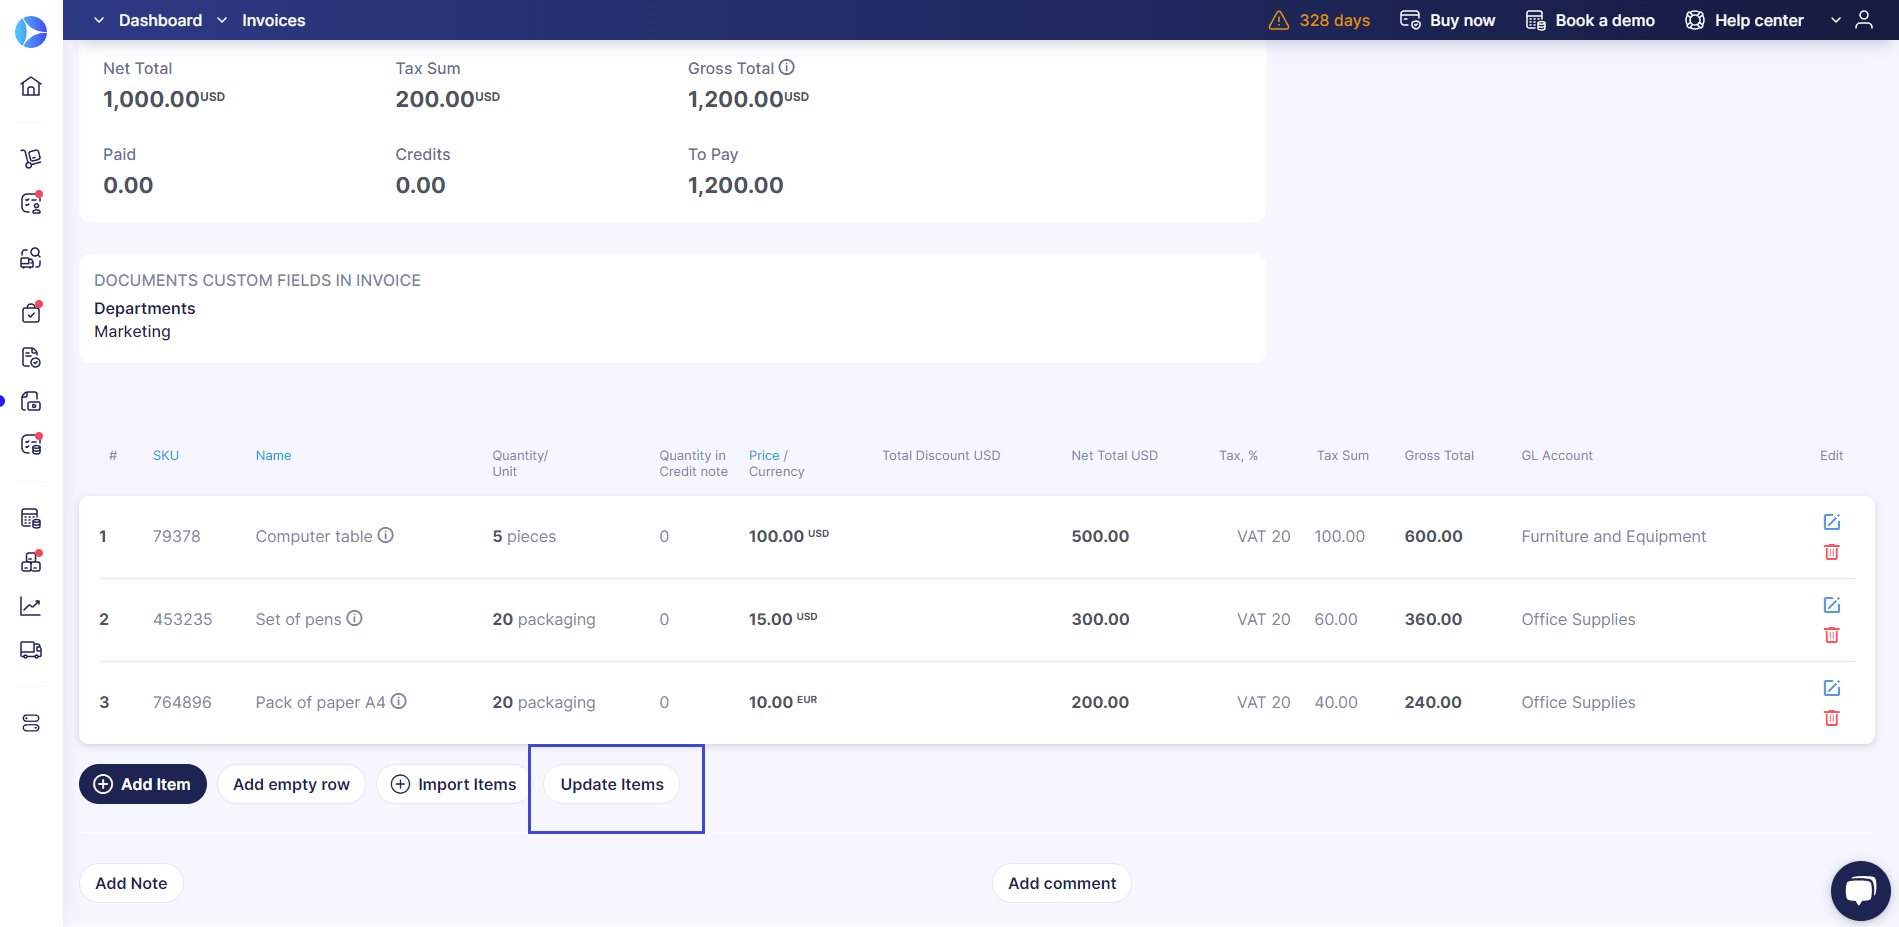
- Open or create an invoice and click the Update Items button.
- Download the template file and make any necessary edits, such as deleting or adding new items.
- Remove any tips or instructions from rows 2 and 3 before submitting the updated file to Precoro.
💡Please do not edit the Item ID column. Making changes to this column can result in inaccurate data being displayed in the Reports and Inventory sections.
Filter items when adding them to receipts
We've made it even easier to add items to receipt documents with our latest update. Now, users can apply filters to sort through a large number of items and create receipts from purchase orders effortlessly.
📖 To learn more about how to create a receipt from a PO and match it, follow the link to our Knowledge Base.
You can apply filters in the following fields:
- Name field, where you can specify the information in the search line.
- Items Custom Fields in Receipts (if such are activated). 📖 For more information on activating ICFs for documents, visit our article here.

New in integrations
Better supplier mapping with Xero
We continue improving the supplier mapping process with integrated tools. Previously, if you created a supplier in Precoro with the same Name value as in Xero, all Xero supplier data would get erased and replaced with the information entered in Precoro.
Now, when mapping a new supplier in Precoro with an already existing one in Xero, the information will be taken from Xero and updated in Precoro.
📖 To learn more about the data synchronization between Xero and Precoro, please refer to this link.
Improved item synchronization with Xero
We've also enhanced our item mapping process with Xero by introducing a two-value synchronization logic that considers both the Name and SKU fields. With this improvement, you no longer have to worry about updates happening to a random item with the same name but a different SKU.
Manual supplier mapping and unmapping for NetSuite
On the Supplier Management page, you can now manually map and unmap suppliers that have been integrated with NetSuite. To unmap, simply click on the cross icon in the Action field and you'll receive a system notification once the process is complete.
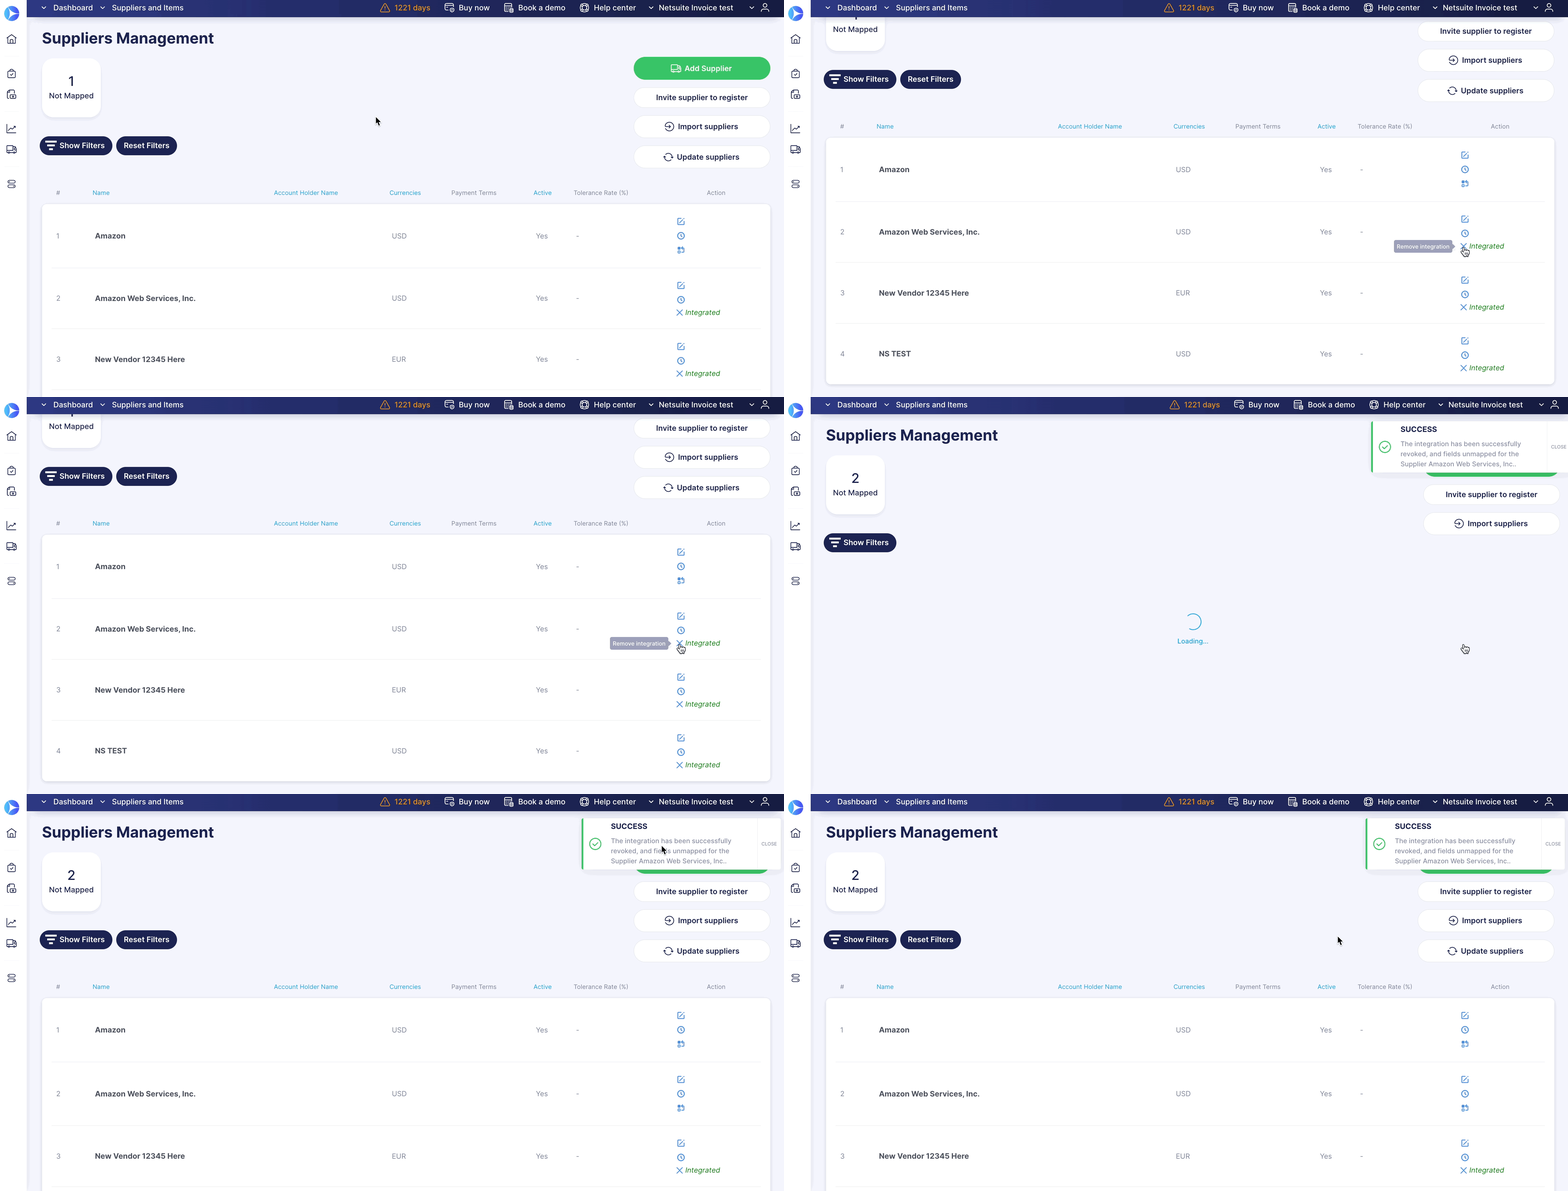
To map a new supplier, click on the mapping icon and the system will automatically match the corresponding entries.
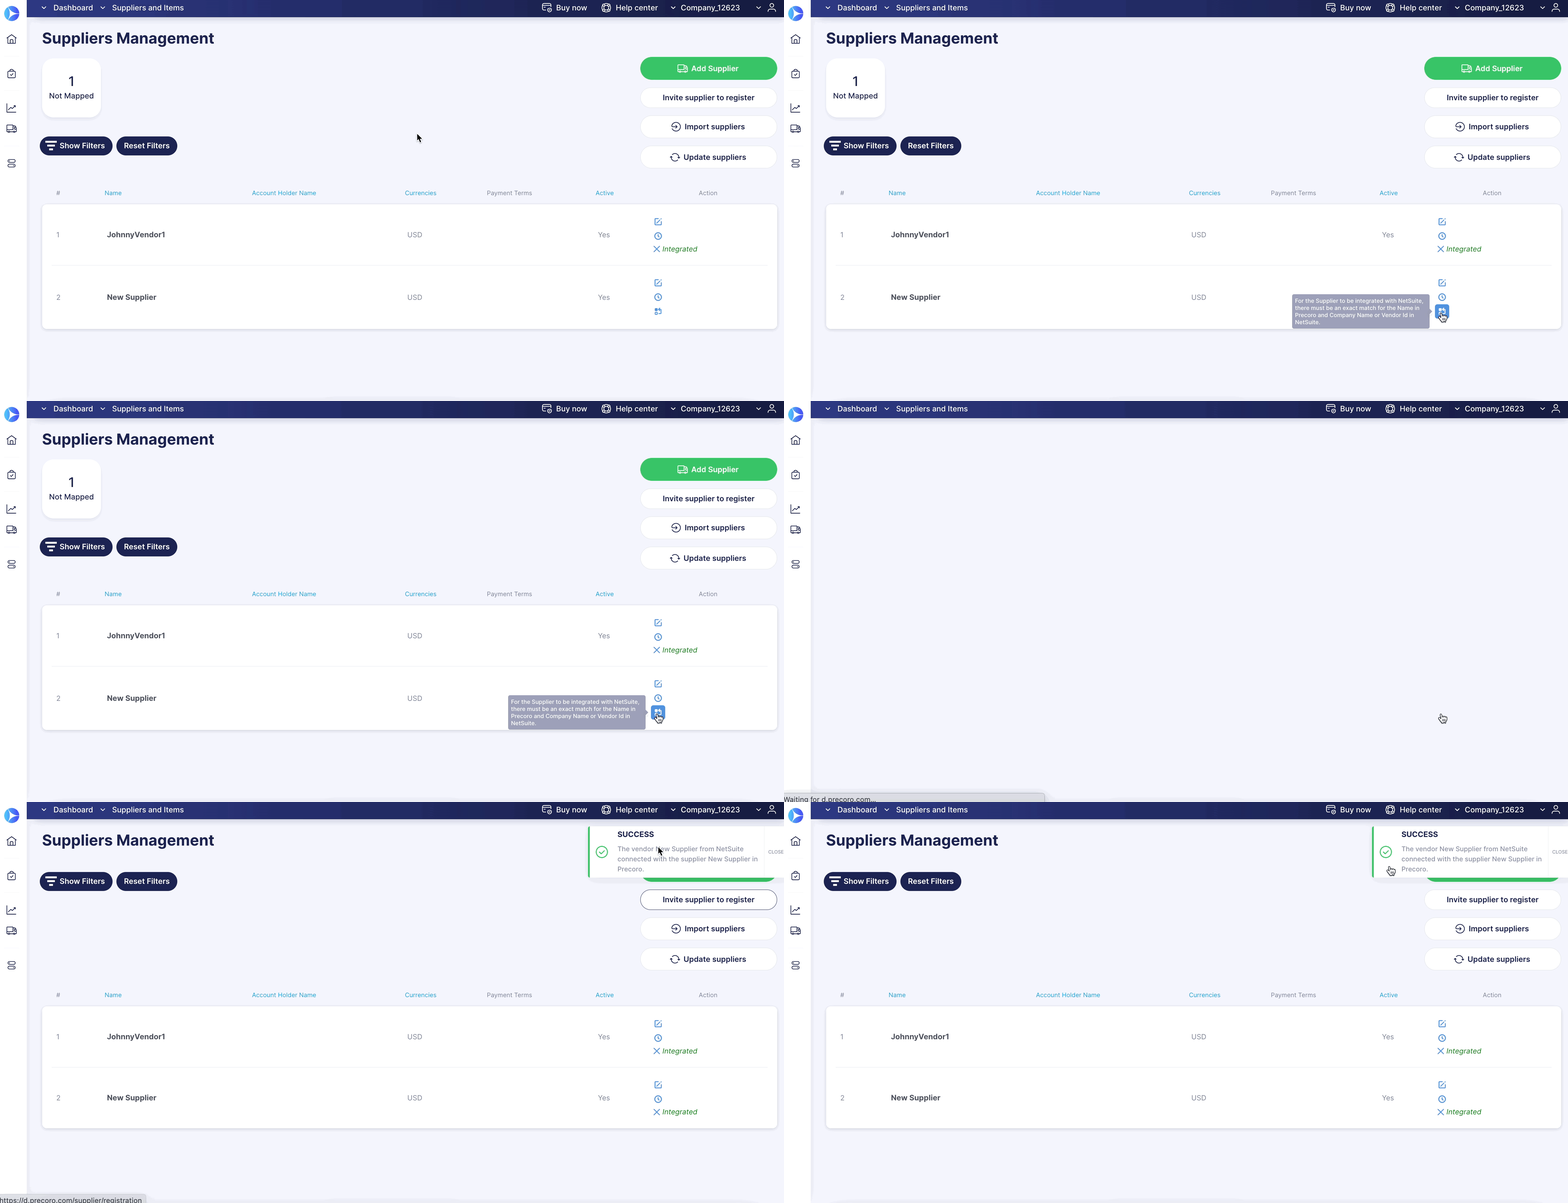
💡 Please note that for a supplier to be successfully synchronized with NetSuite, the Name in Precoro must match the Company Name or Vendor ID in NetSuite exactly.
Import items from QuickBooks manually
When working with QuickBooks, you can now manually import items into Precoro on the Integrations page.
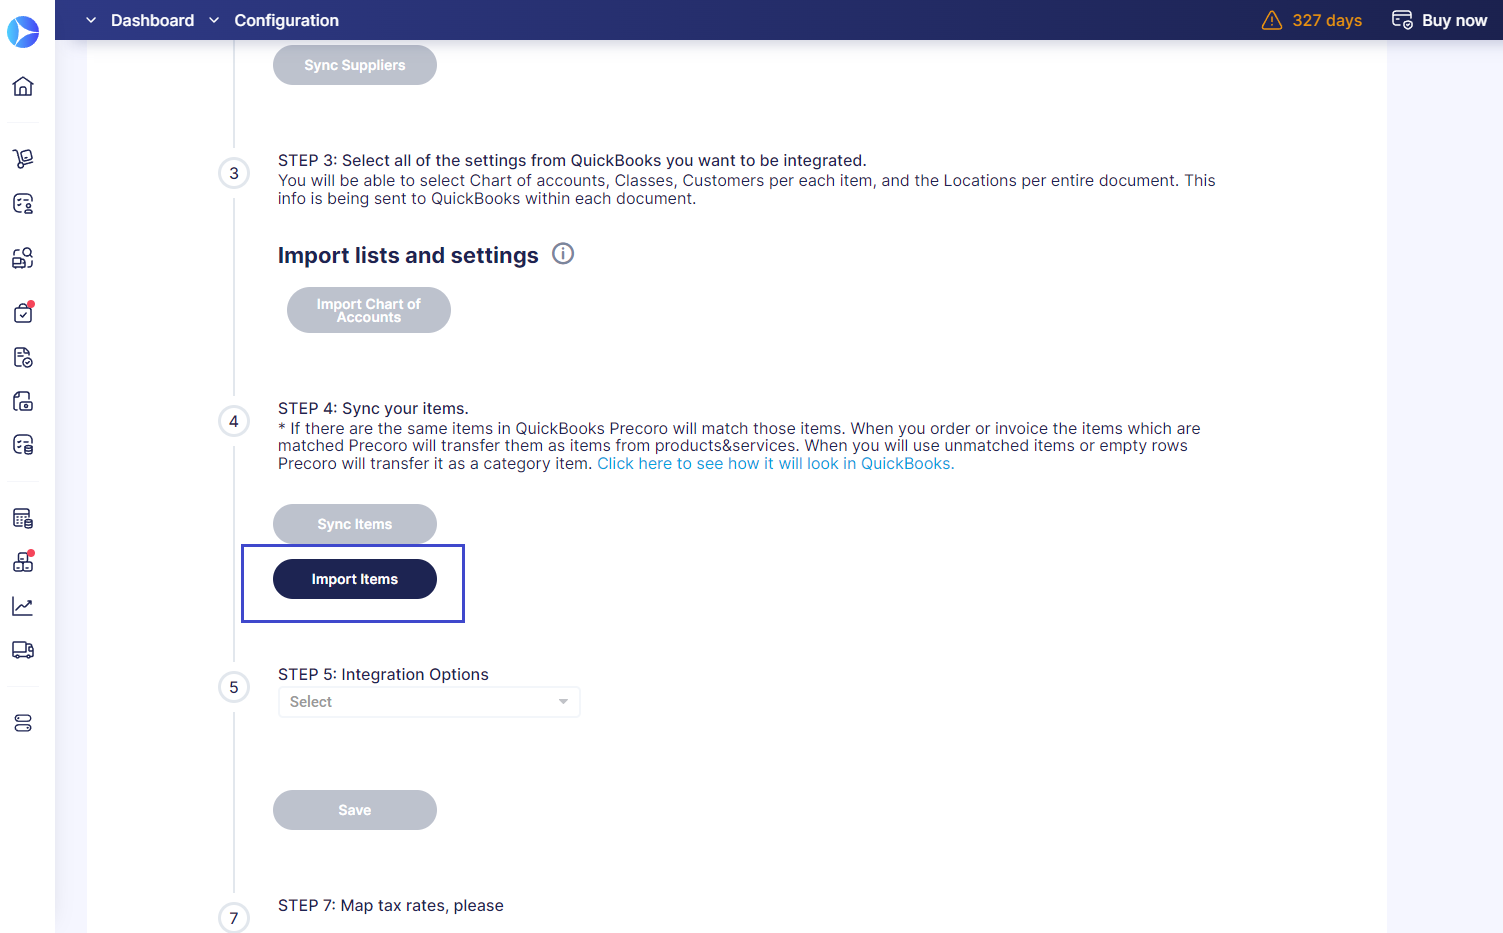
With this feature, you can easily import the following data:
- SKU
- Name
- Description
- Supplier
- Charts of Accounts
New features for managing suppliers
Get notified when suppliers confirm receipt of POs
We’ve made it easier to track the progress of your orders. Starting with this update, you'll notice a new Confirmed status in PO documents when a supplier begins processing the order. This will provide you with greater visibility into the order fulfillment process and will help ensure that there are no delays or miscommunications.
To use this feature:
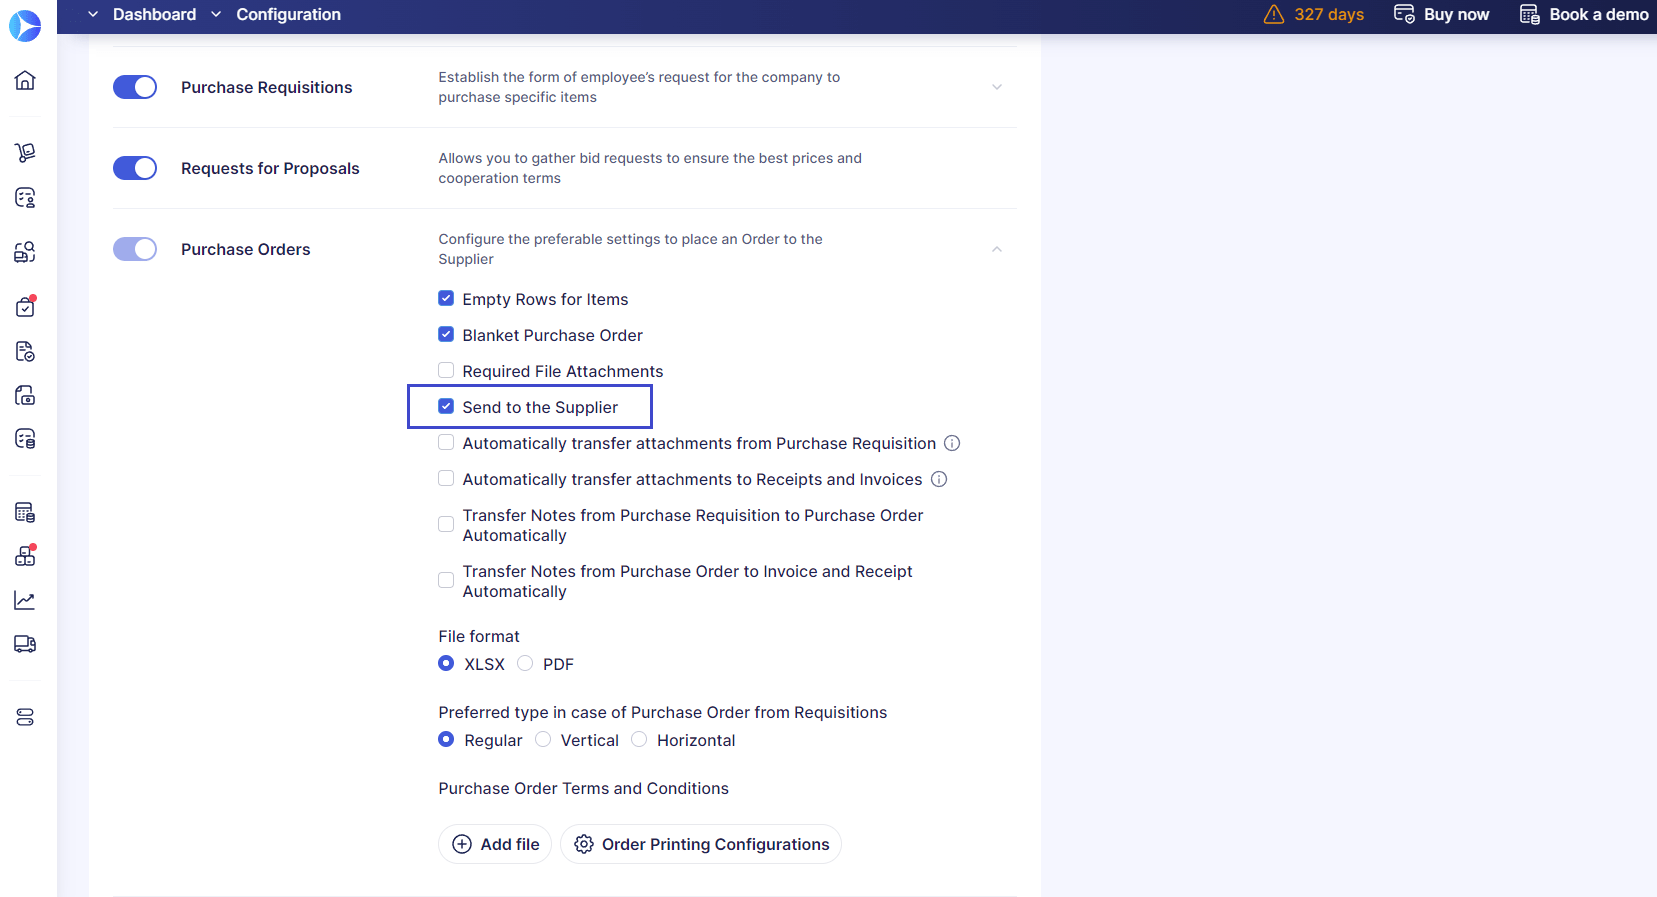
- Navigate to Configuration → Basic Settings → Documents Setup → Purchase Orders → activate the Send to the Supplier checkbox.
- Create and approve your purchase order.
Once the supplier opens the email, you'll see the Message Received tag next to their name on the PO. Once the supplier clicks on the Confirm button, you'll also see the Confirmed tag.
Receive updates about supplier approval status
We’ve made it possible to set up email notifications after your requested supplier has successfully undergone the approval workflow, even if you don't have a Suppliers and Items role.
The emails will keep you informed on whether the suppliers were approved or not and help you quickly decide the next actions.
📖 To learn more about submitting a request for creating a new supplier, check out this helpful article.
Adding new suppliers to existing requests for proposals
If you've already created an RFP document, added potential suppliers, and received their proposals, but you haven't found a suitable fit, there's no need to start over. Instead, you can revise the existing RFP and add new suppliers.
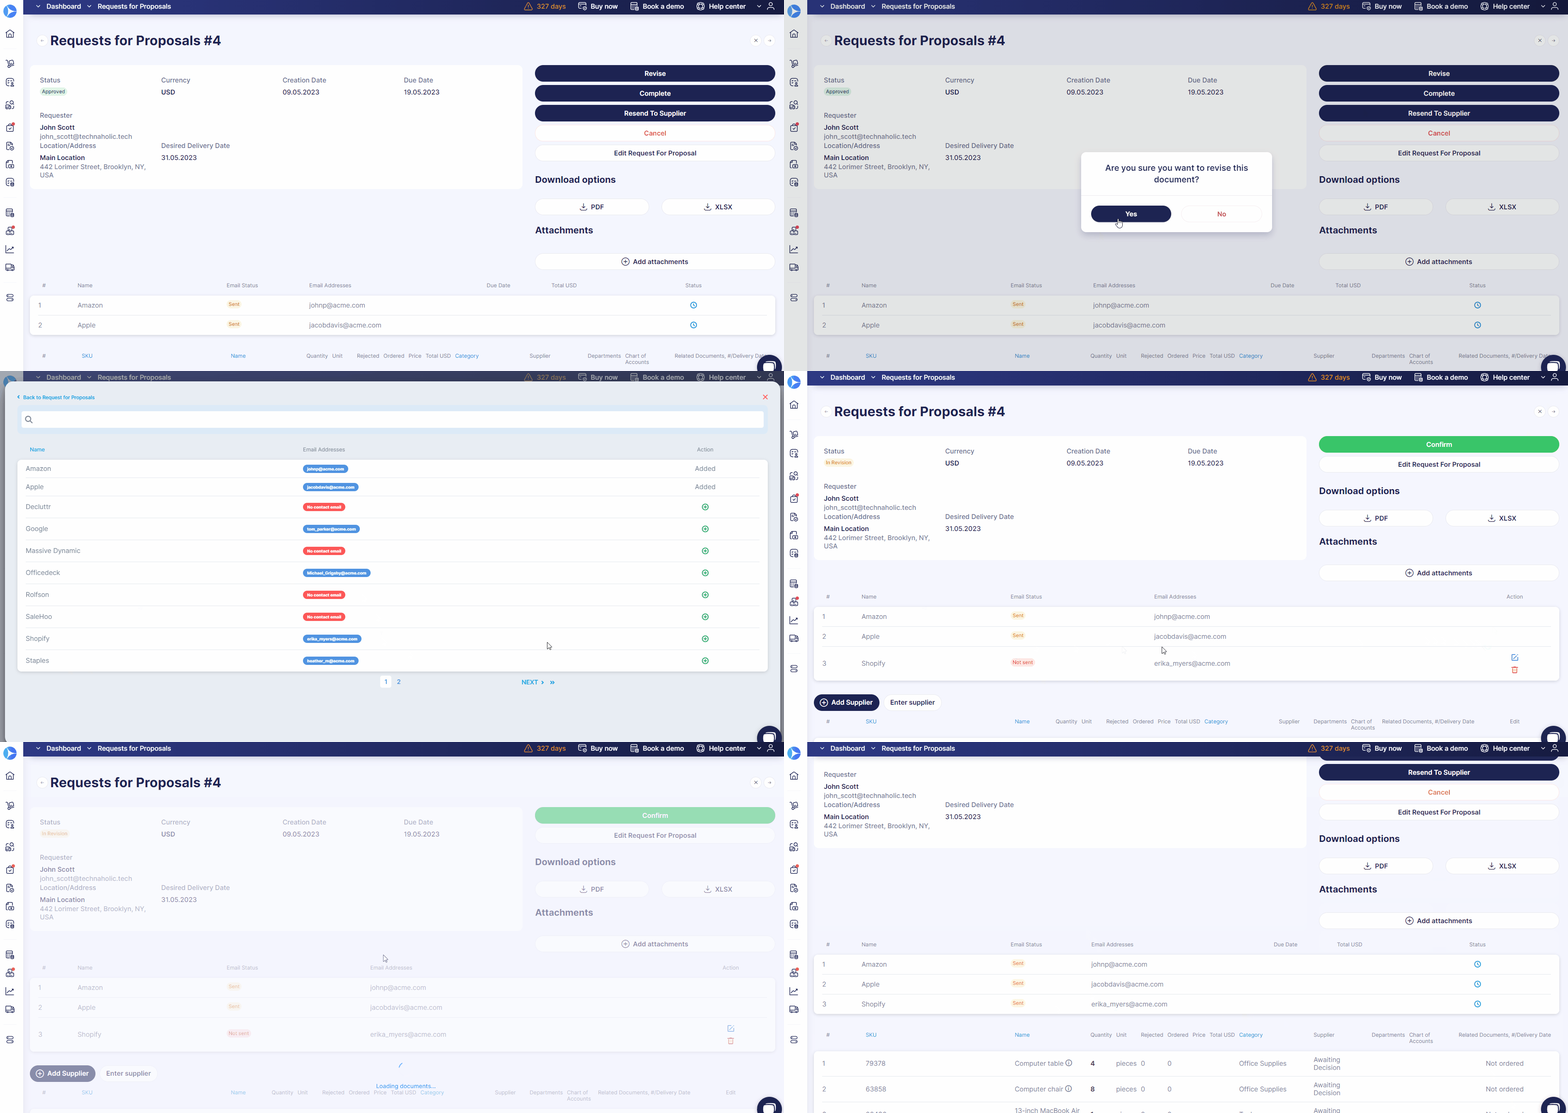
Once you've completed the revision, Precoro will send standard email notifications only to the newly added vendors. They will then undergo the standard proposal submission process.
💡 Please note that you won't be able to edit or delete the suppliers you've previously added to the document; you can only add new ones.
Resend invitations to suppliers
To enhance the supplier registration workflow, we've made some changes to the invitation system. Now, you have the option to resend invitations and edit contact information when a form is either in the Revision or Sent status. Additionally, if you add a new email address, the document will be sent to that address.
As for the suppliers, they can now add multiple contacts and their information using the plus sign. This will allow for more efficient communication between your company and the suppliers.
Updated design features
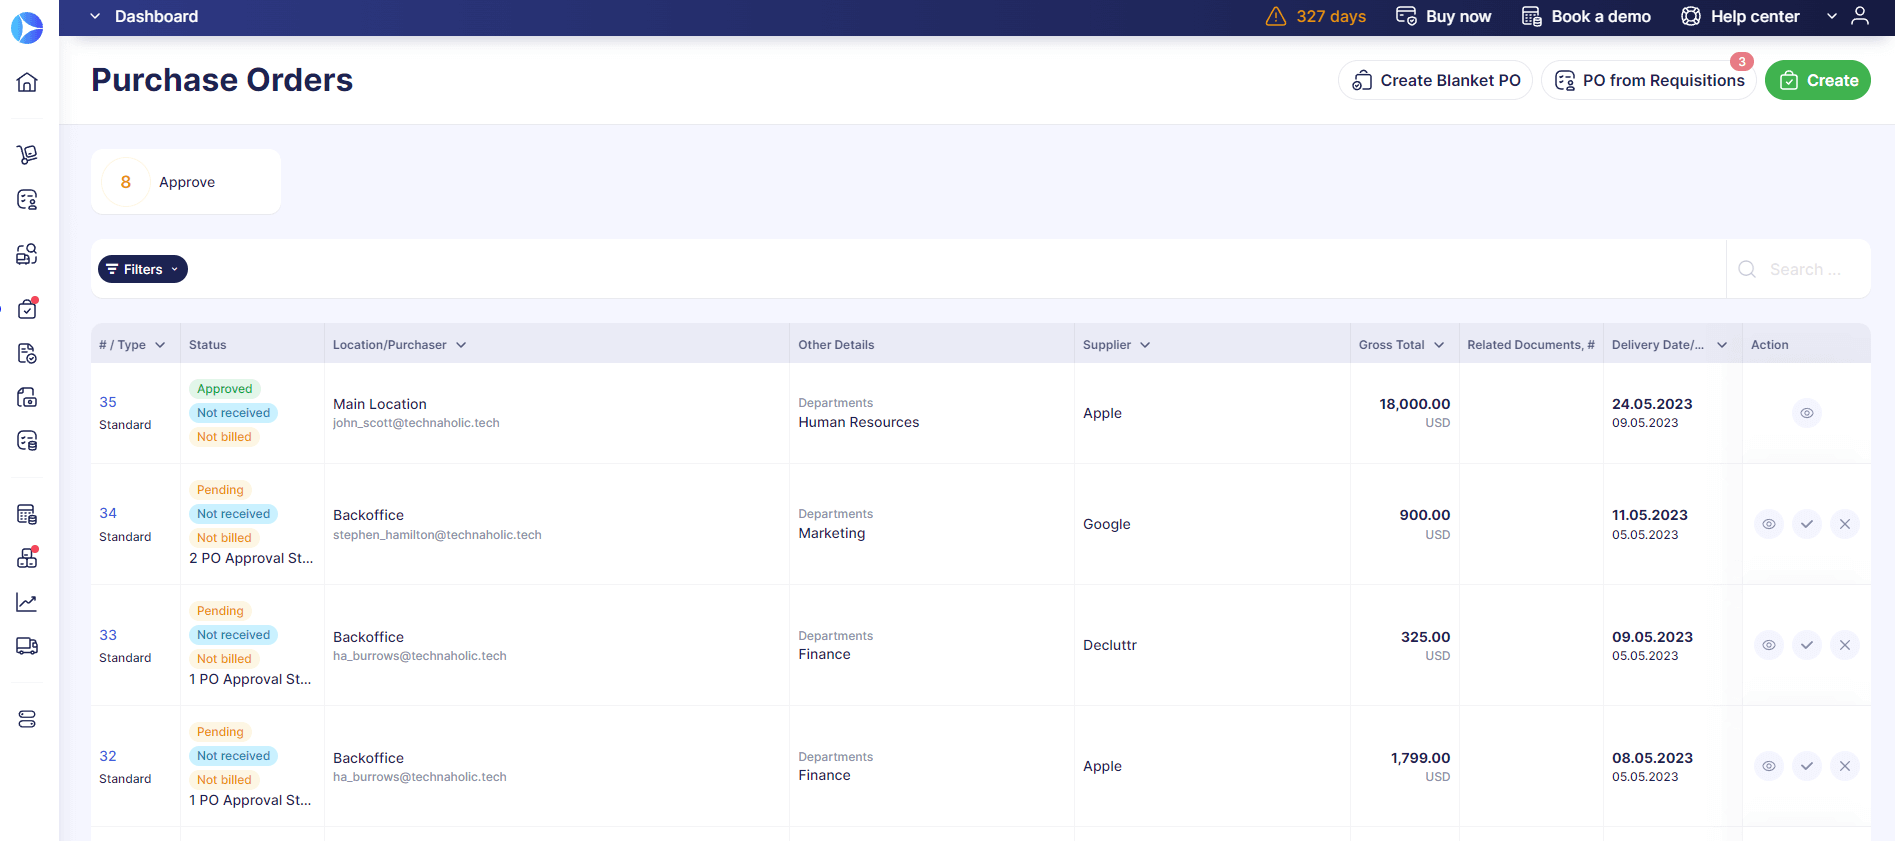
We've upgraded all of Precoro's document pages with a sleek and intuitive table design to make your product experience more visually appealing.
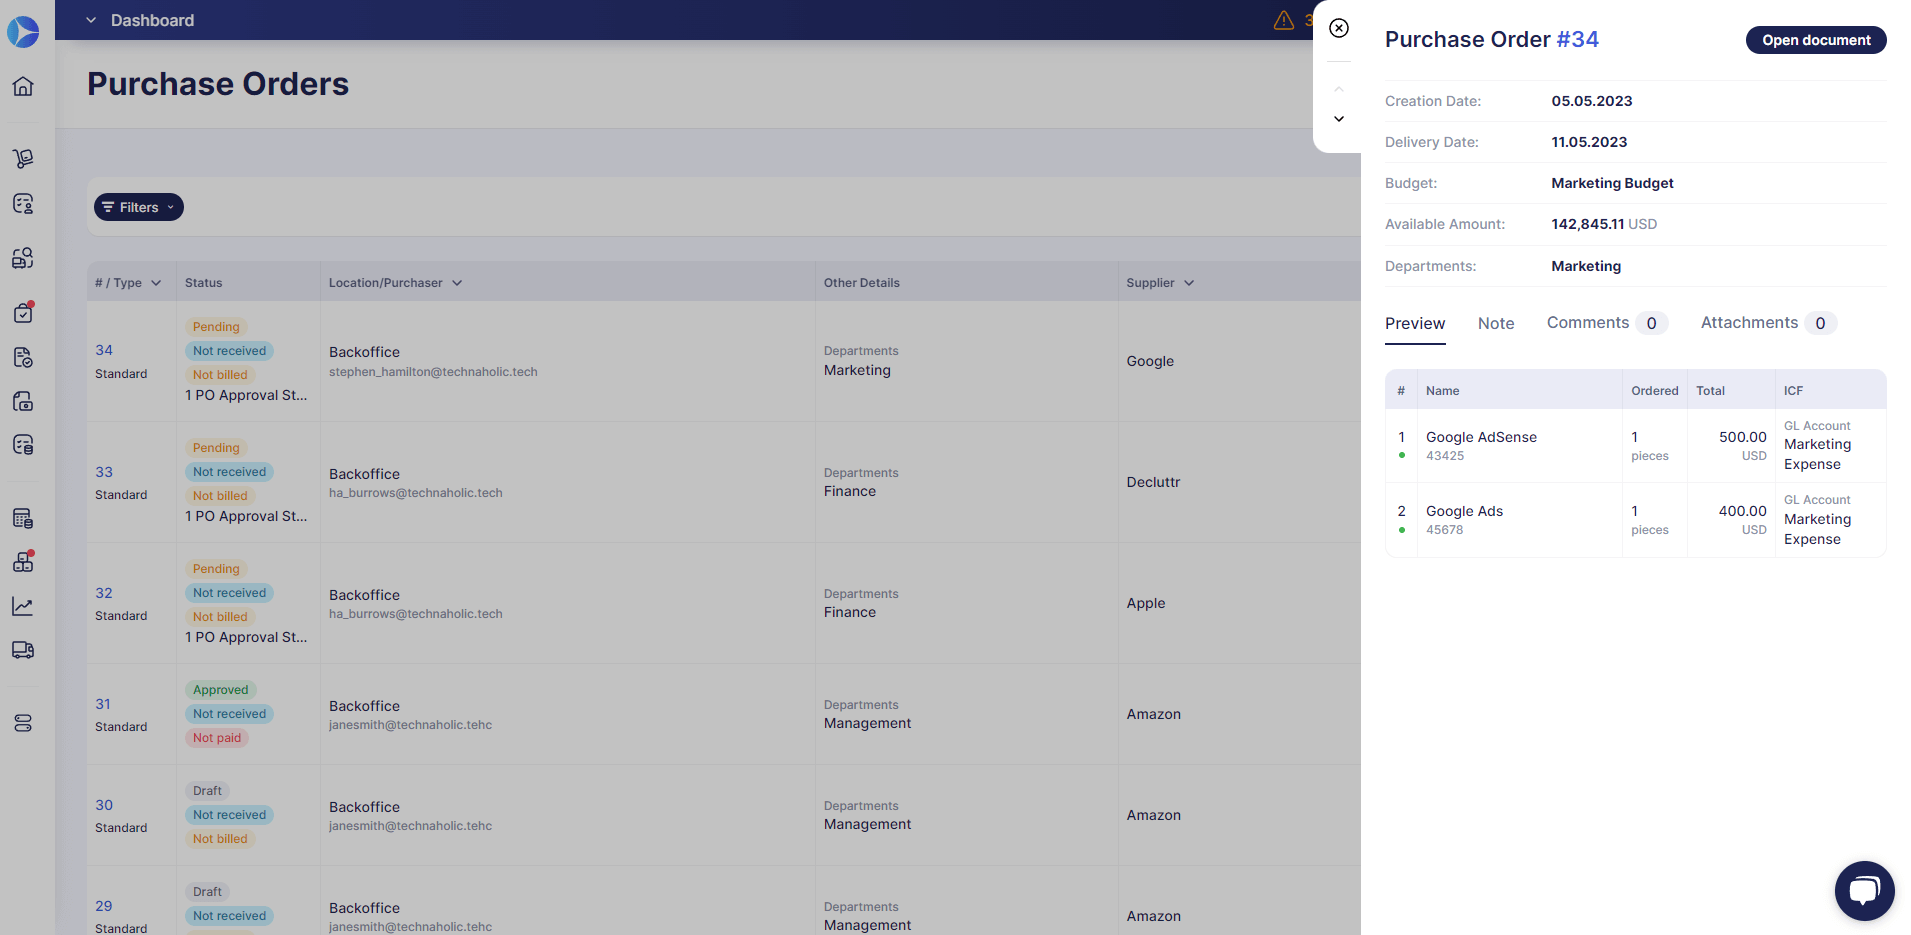
Additionally, we also improved the document preview mode. The preview is bigger, better structured, and makes it easier to find the information you need.
Other Upgrades
Required attachments in purchase requisitions
We’ve added the ability to make attachments in purchase requisitions required.
To activate this function, simply follow these steps:
- Go to Basic Settings → Documents Setup → Purchase Requisitions and activate the Required File Attachments checkbox.
- Press Save to implement changes.
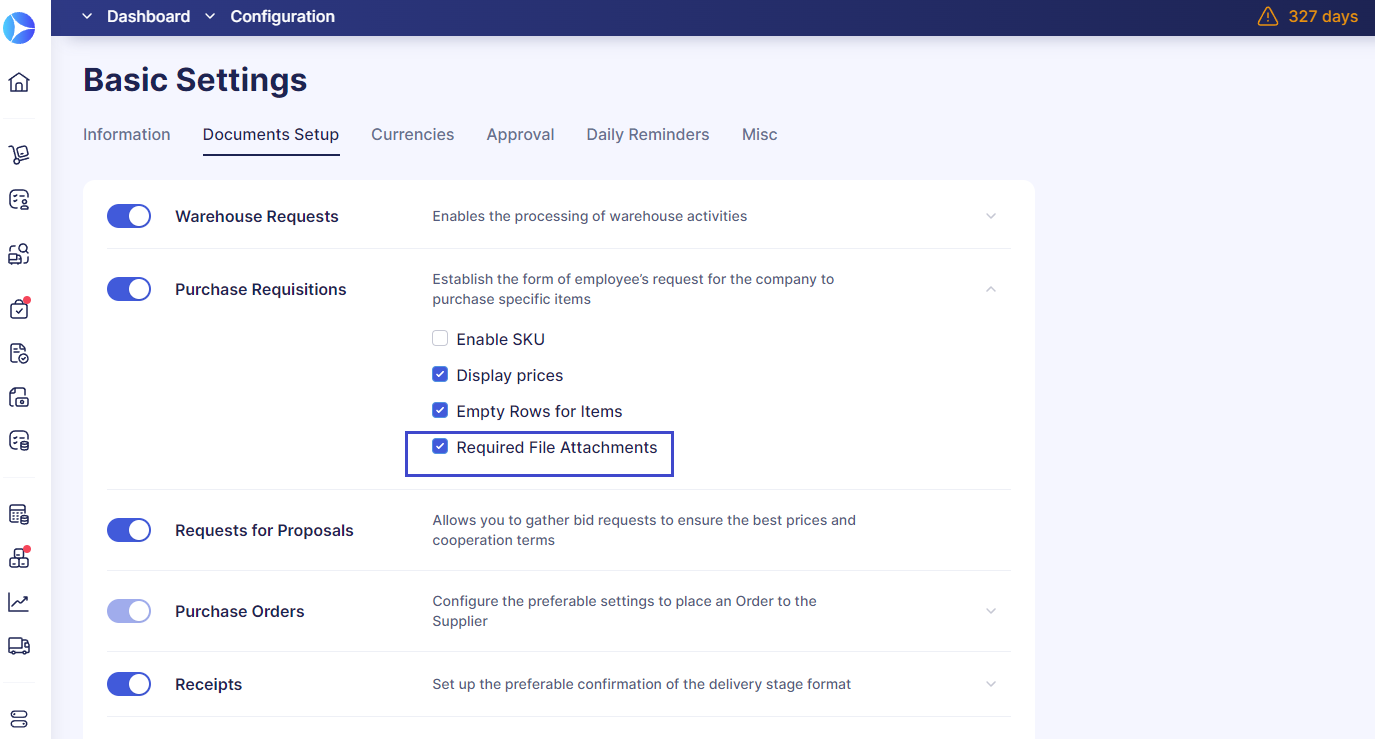
Once enabled, users won't be able to confirm a PR without uploading the required documents. If you choose to disable the feature, users will be able to confirm documents without attaching any files.
New manual exchange rate
Now, when you use the document Repeat function, the manual exchange rate from the previous document will not be transferred to the new one. This means you can input fresh exchange rates without needing to delete the old ones.
📖 For more information on currency exchange rates in Precoro, please refer to this resource.
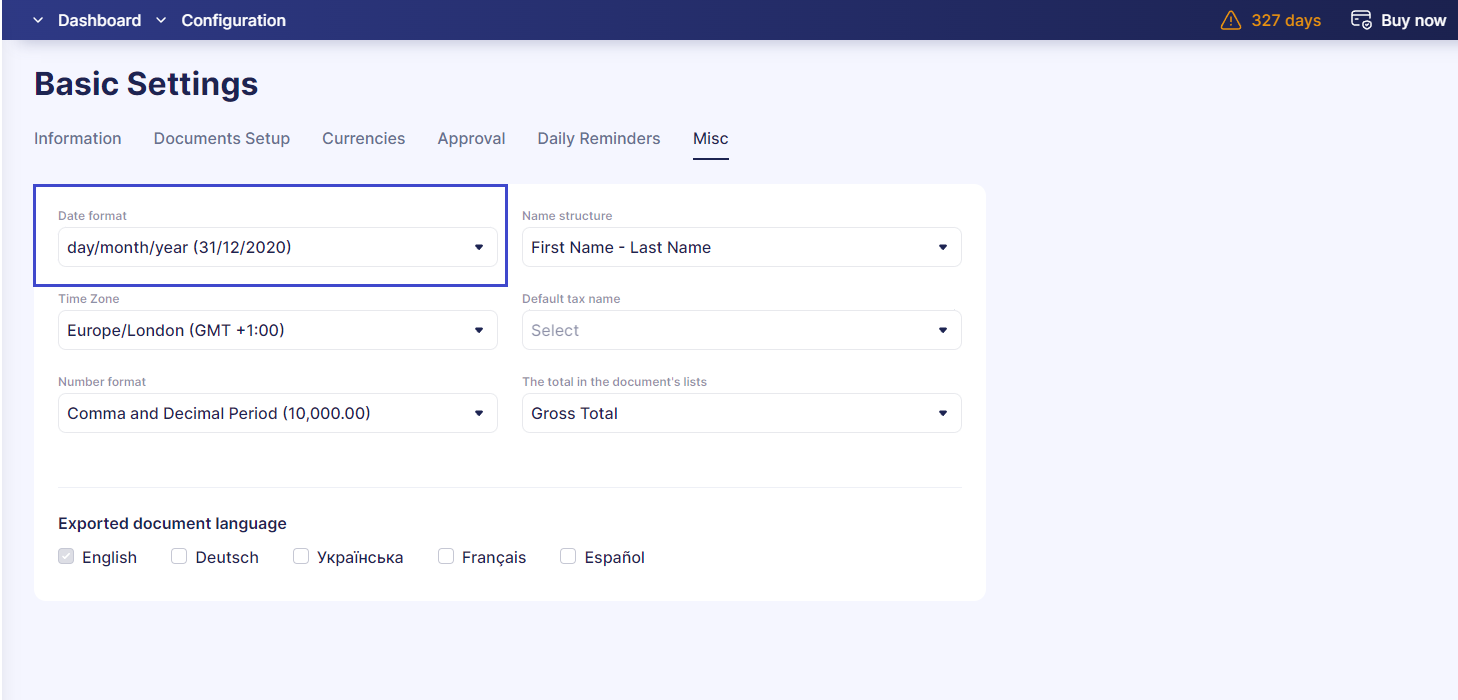
Added a new date format
We’ve added a new date format to Precoro: day/month/year (31/12/2020). You can find it in Configuration → Basic Settings → Misc.
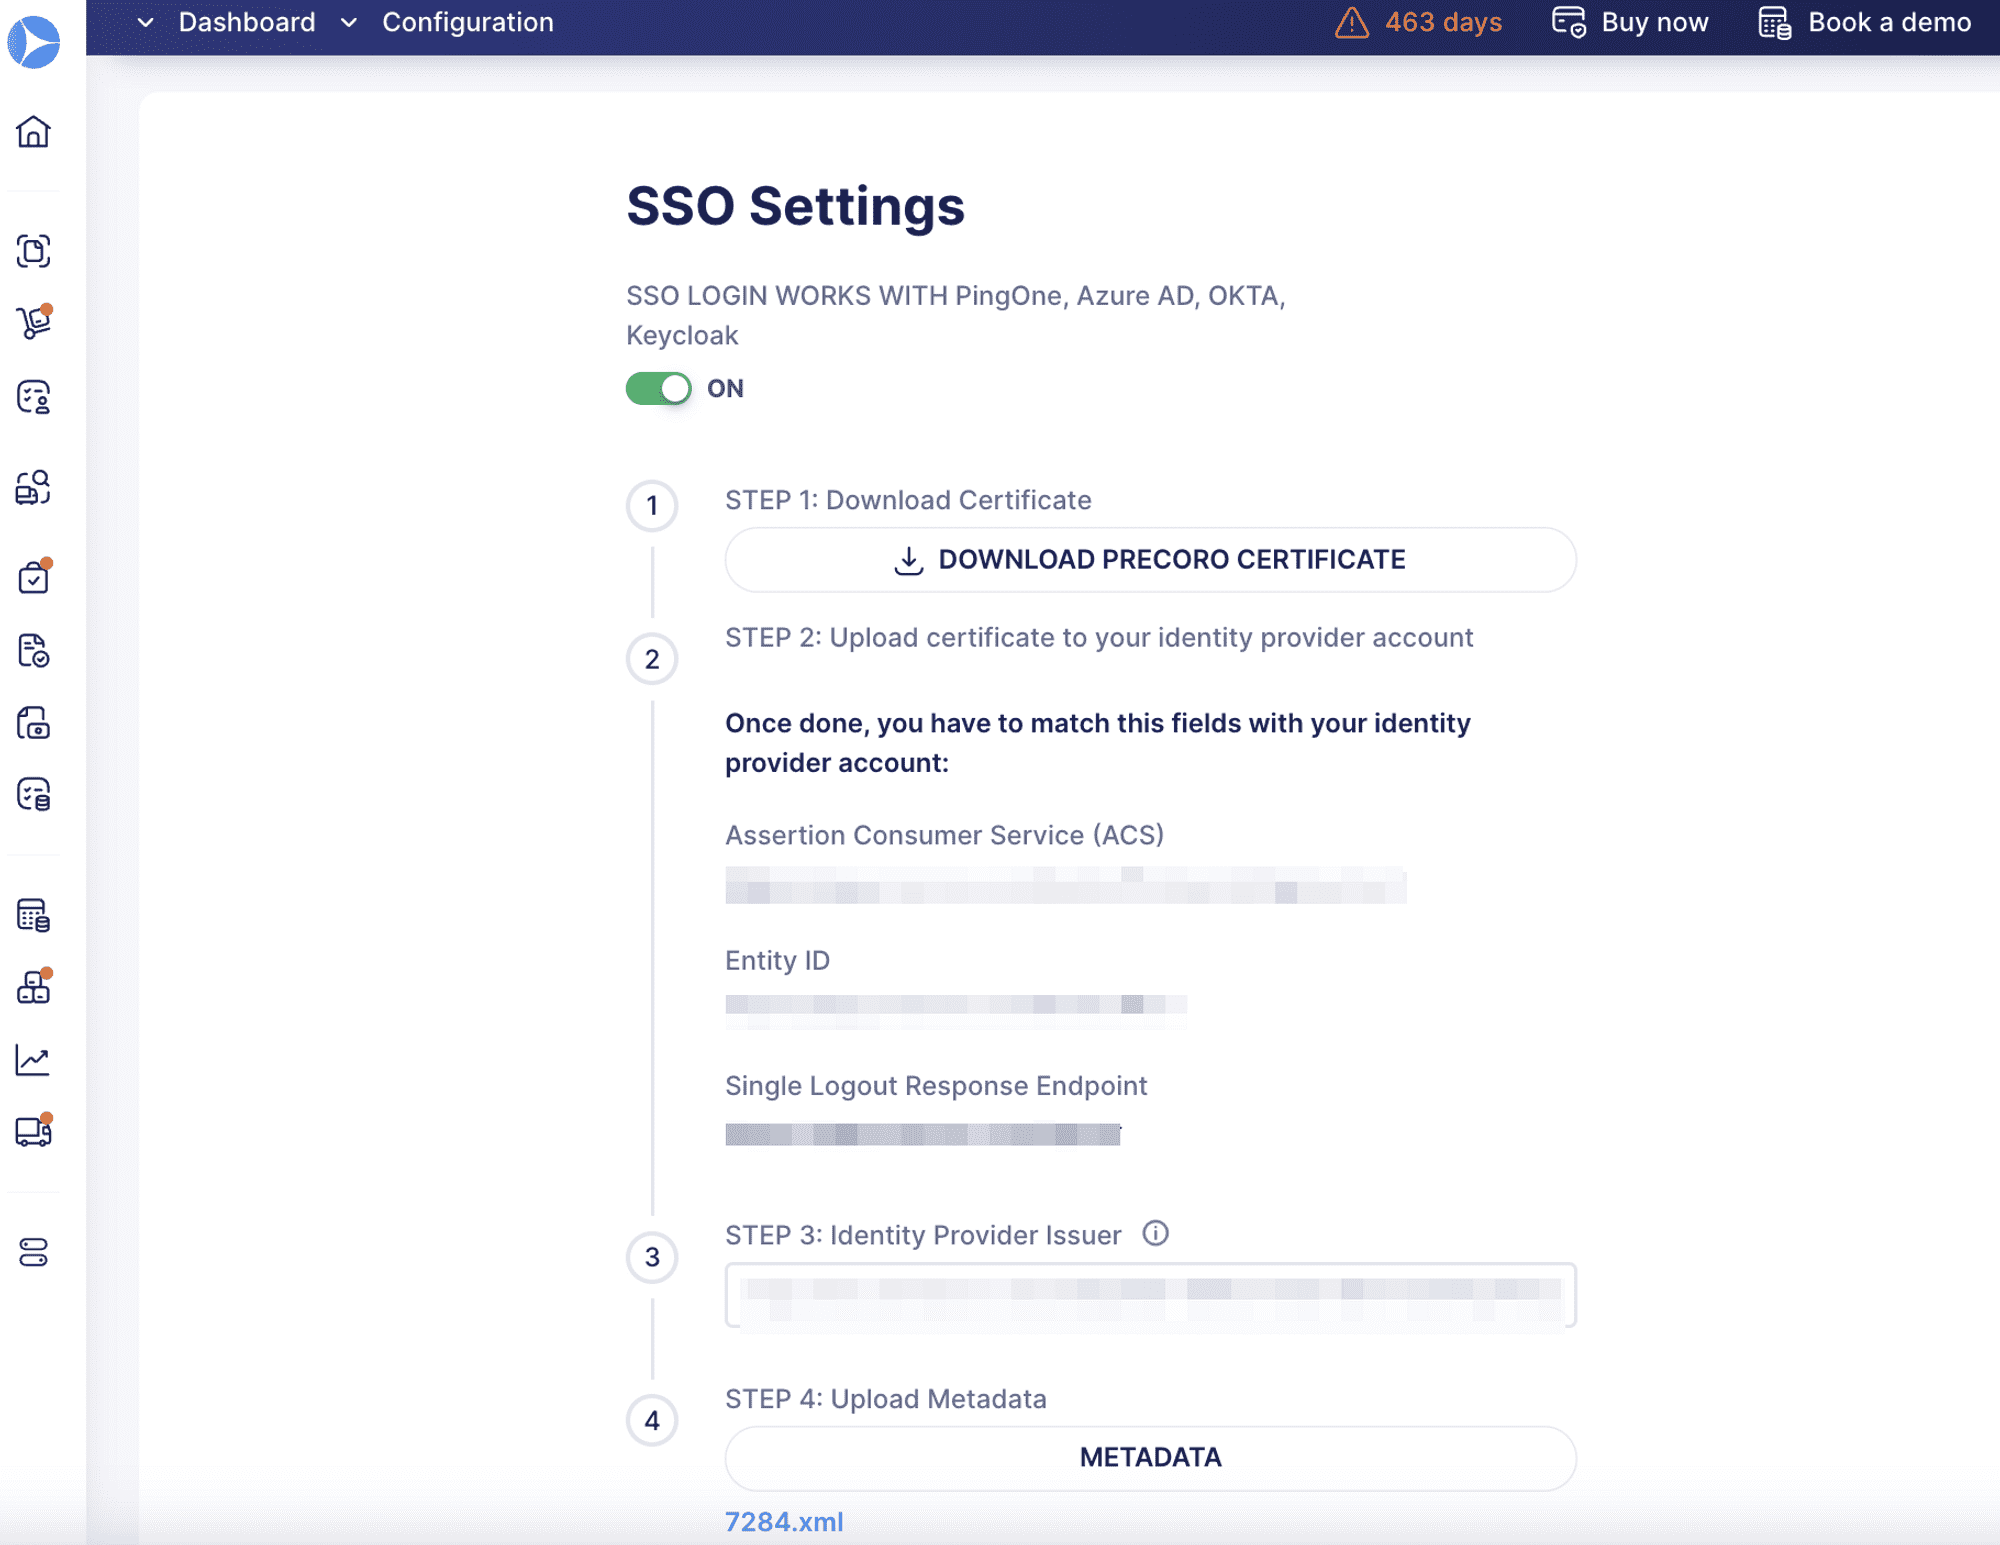
Removed restrictions on SSO uniqueness
Now you can have the same SSO setup for multiple accounts within your organization.
We're already working on some amazing new features that we're confident you'll love 😉. Stay in touch so you don't miss out on any of our upcoming updates.


