6 min read
Product Update, December 2022
Precoro rolls out end-of-year updates to Revision History audit, automatic Delivery Date filling, new filtering, and customization options.
Updated Revision History Audit
The ability to know precisely who accessed a document, when they accessed it, and what changes employees made to it is essential for high visibility and control over organizational processes.
With Precoro's latest update, we added new fields to Revision History in documents, so information about applied changes will be as complete as possible.
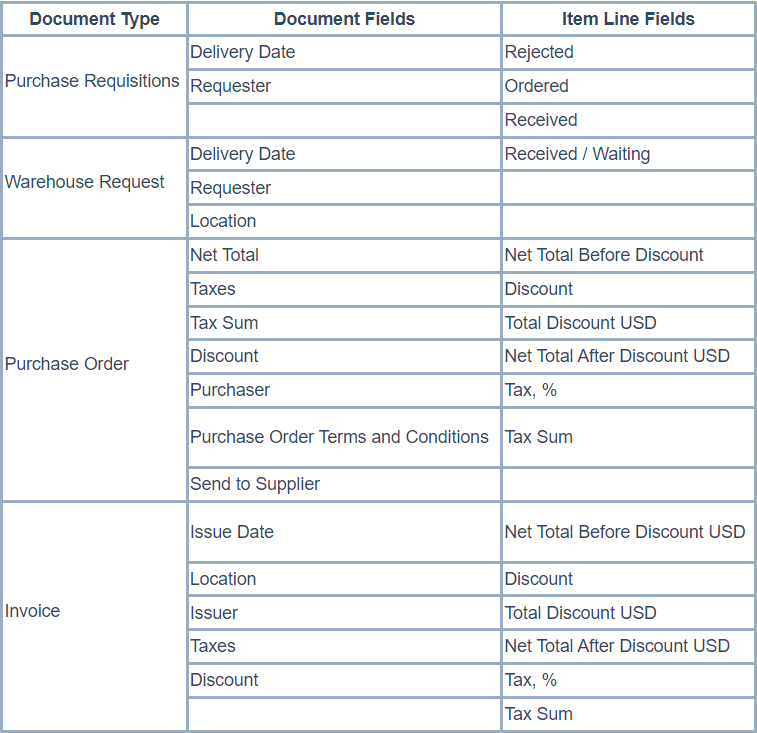
Here is the list of document types and fields where you can track the revisions:
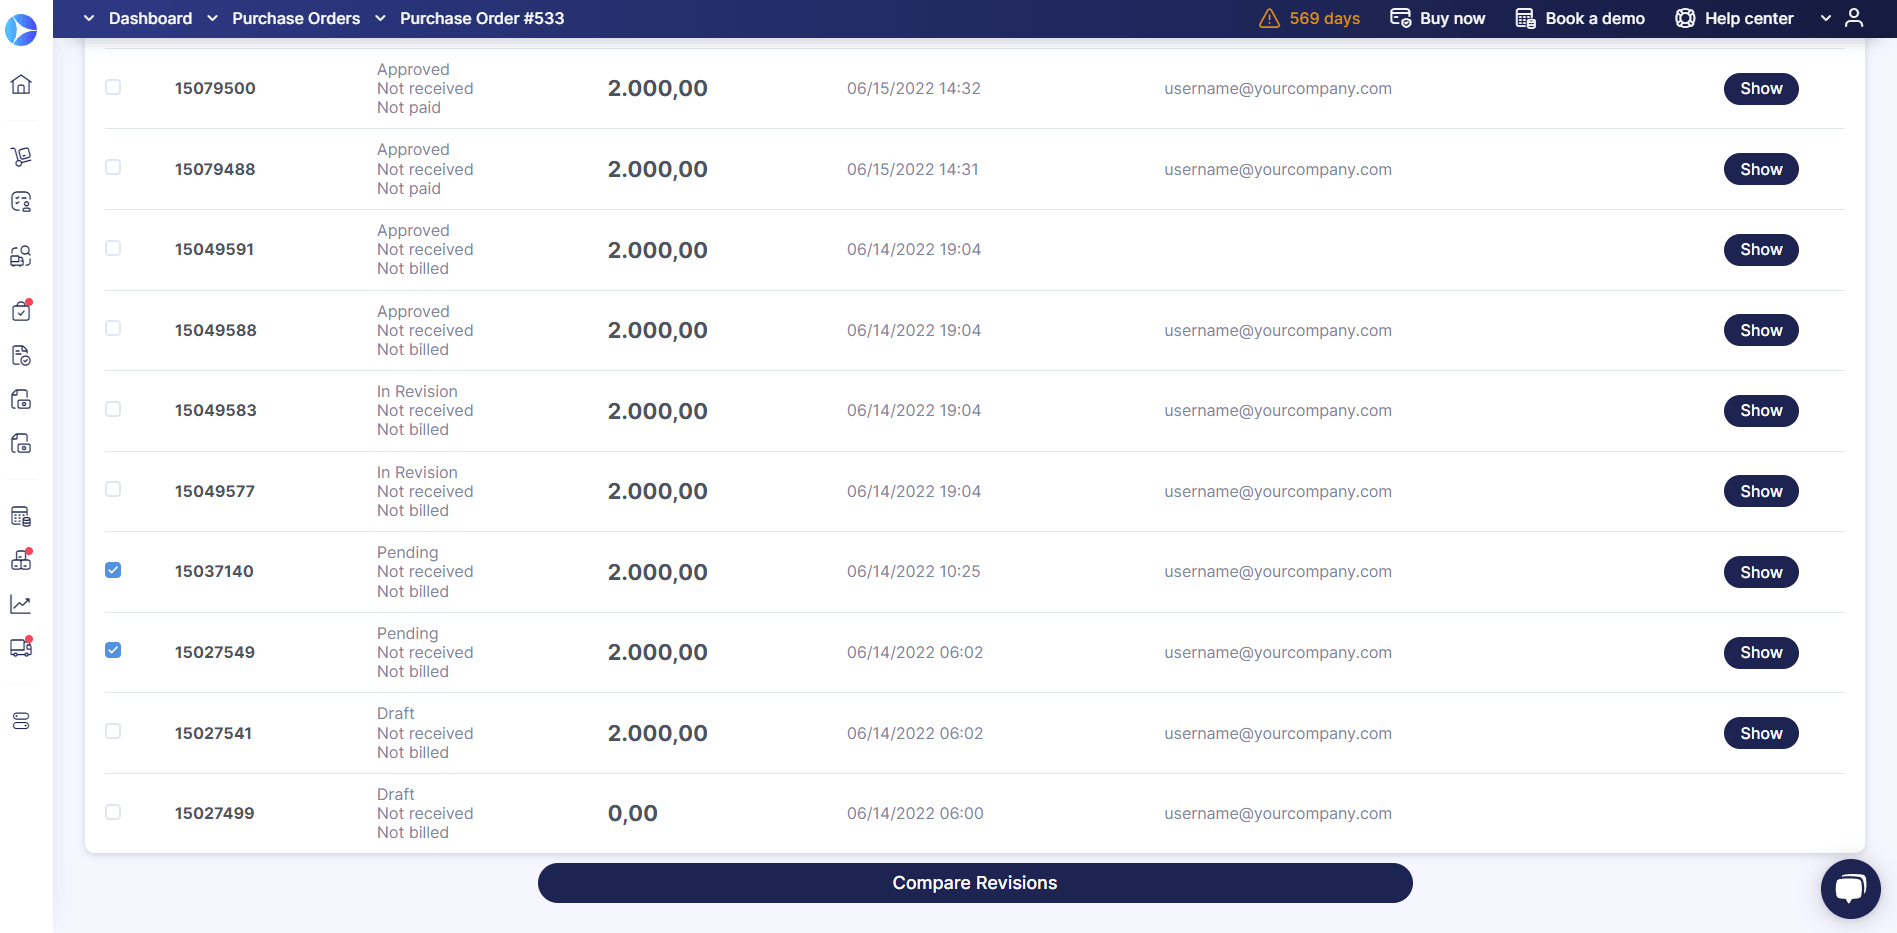
To compare two revisions:
- Open the document in which you want to track revisions;
- Press the Revision History button;
- Mark two revisions you want to compare; and
- Press the Compare Revisions button at the bottom.
Follow this link to our Knowledge Base for more instructions on using Revision History.
Filter Purchase Requisitions by the Items Custom Fields
We continue to work on filtering options so that you can quickly and easily browse documents and find what you are looking for.
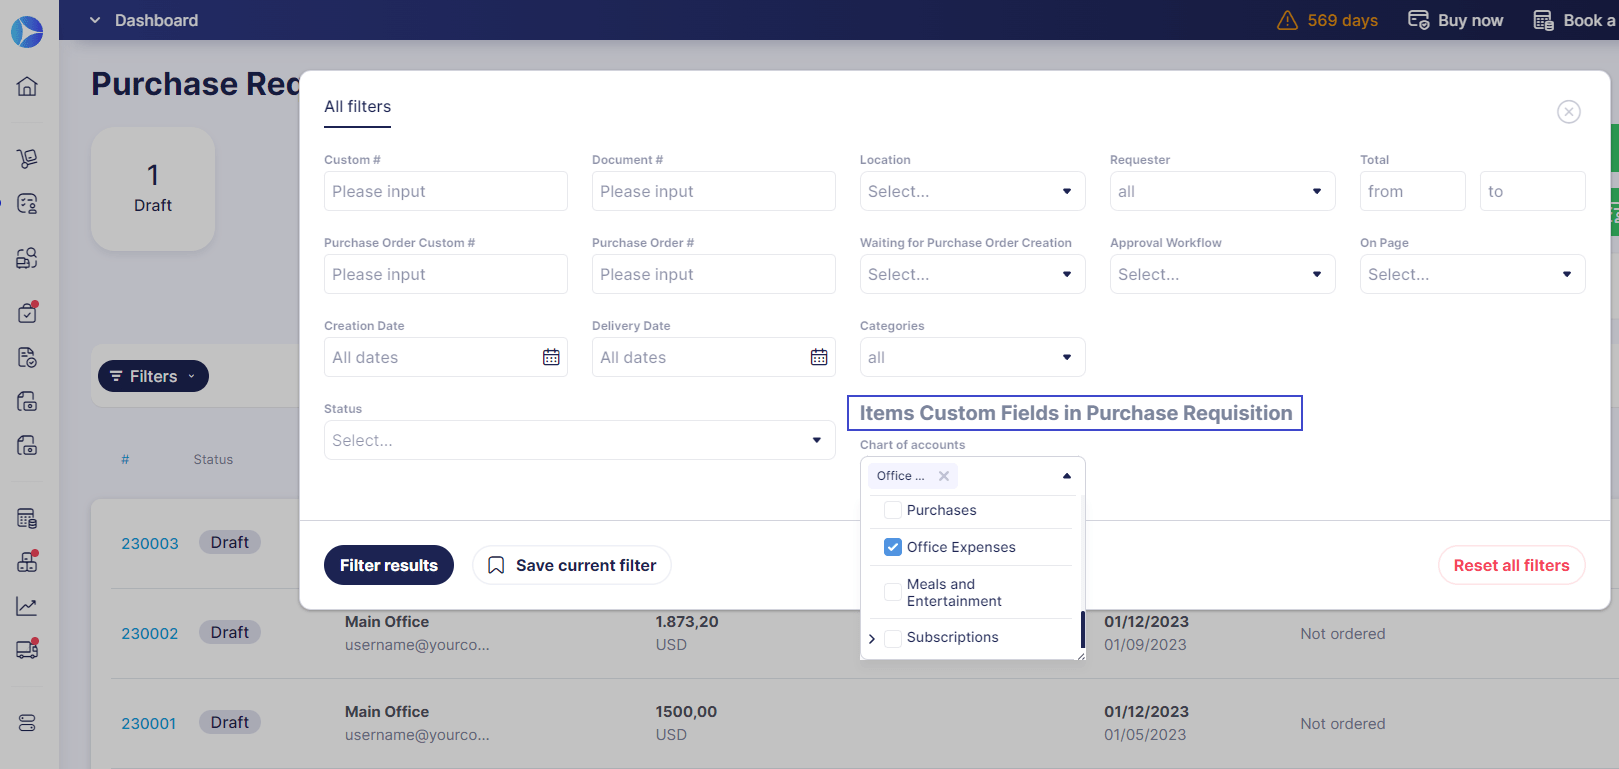
With this update, we added the ability to filter Purchase Requisition documents by the Items Custom Fields.
How the filtering works:
- If you filter by a specific ICF parameter, you get a list of PR documents that have at least one item with the specified parameter.
- If you filter simultaneously by several ICF options, you get a list of documents with at least one item that fully matches the selected ICF.
To filter Purchase Requisitions by the Item Custom Fields option, follow these steps:
- Make sure you have activated the necessary Items Custom Fields for the Purchase Requisition documents.
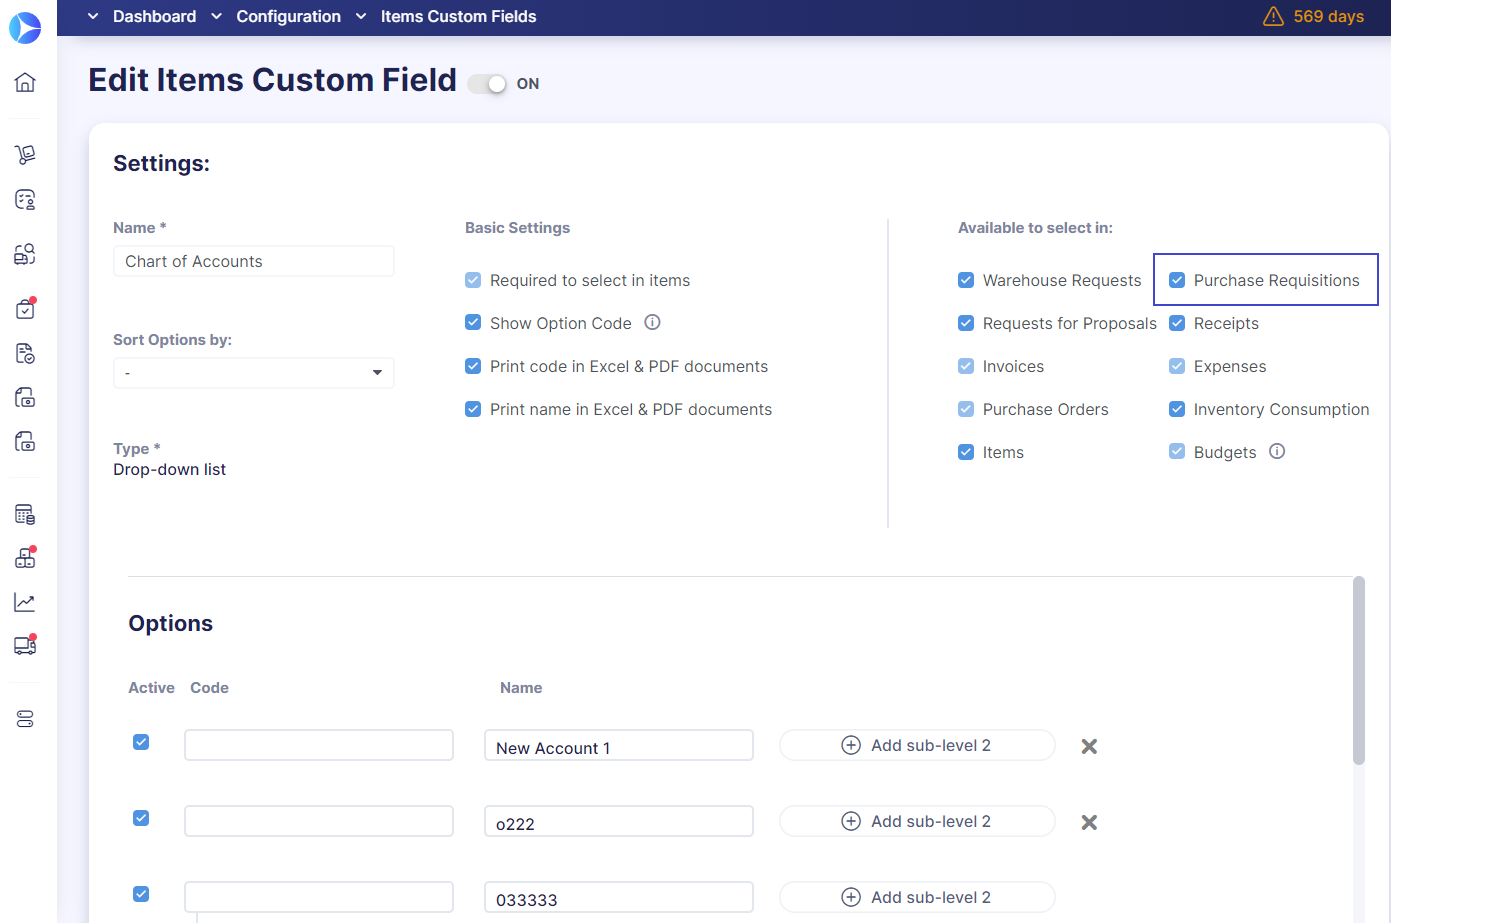
- Go to the Purchase Requisitions management page and click on the Filters button.
- Under Items Custom Fields in Purchase Requisition, select the desired custom field options.
Set tax as a required field
Setting the Taxes field as mandatory can help eliminate manual errors in your company workflow and ensure that the total cost of the purchase is calculated correctly.
You can enable this feature to make the Taxes field required in the following documents:
- Purchase Order
- Invoice
- Expense
After the Taxes field becomes mandatory, users will only be able to save new documents if they have added the tax either in the document or in the item lines.
With existing documents, the Taxes field will be required in the following cases:
- When you enable this feature and revise the documents where taxes were previously not required.
- When documents need to be revised that originally required the Taxes field upon their creation.
To make the Taxes field required:
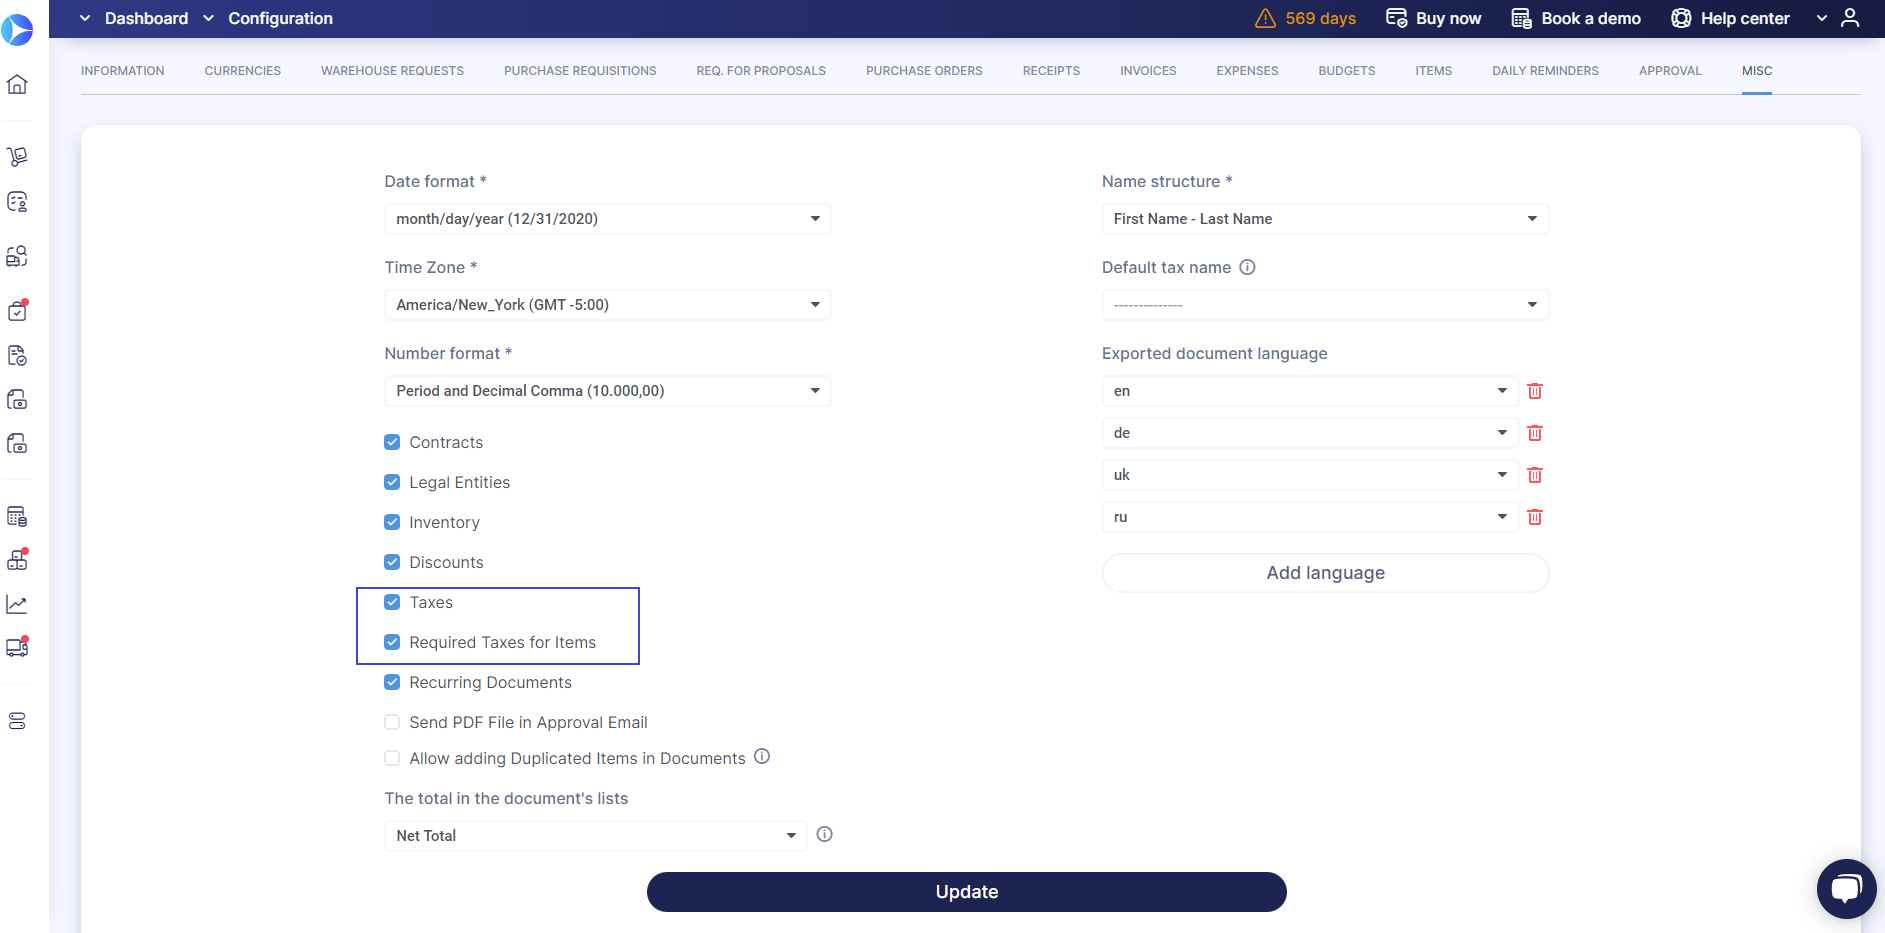
- Open Configuration → Basic Settings → MISC and check the Taxes box.
- After that is checked, the Required Taxes for Items checkbox will become available. Make sure to check this box, too.
Read our article "How to Set Up Tax Rates and Withholding Tax Rates" in our Knowledge Base.
New fields in the item import template
With the current update, we have added three new fields to the item import template:
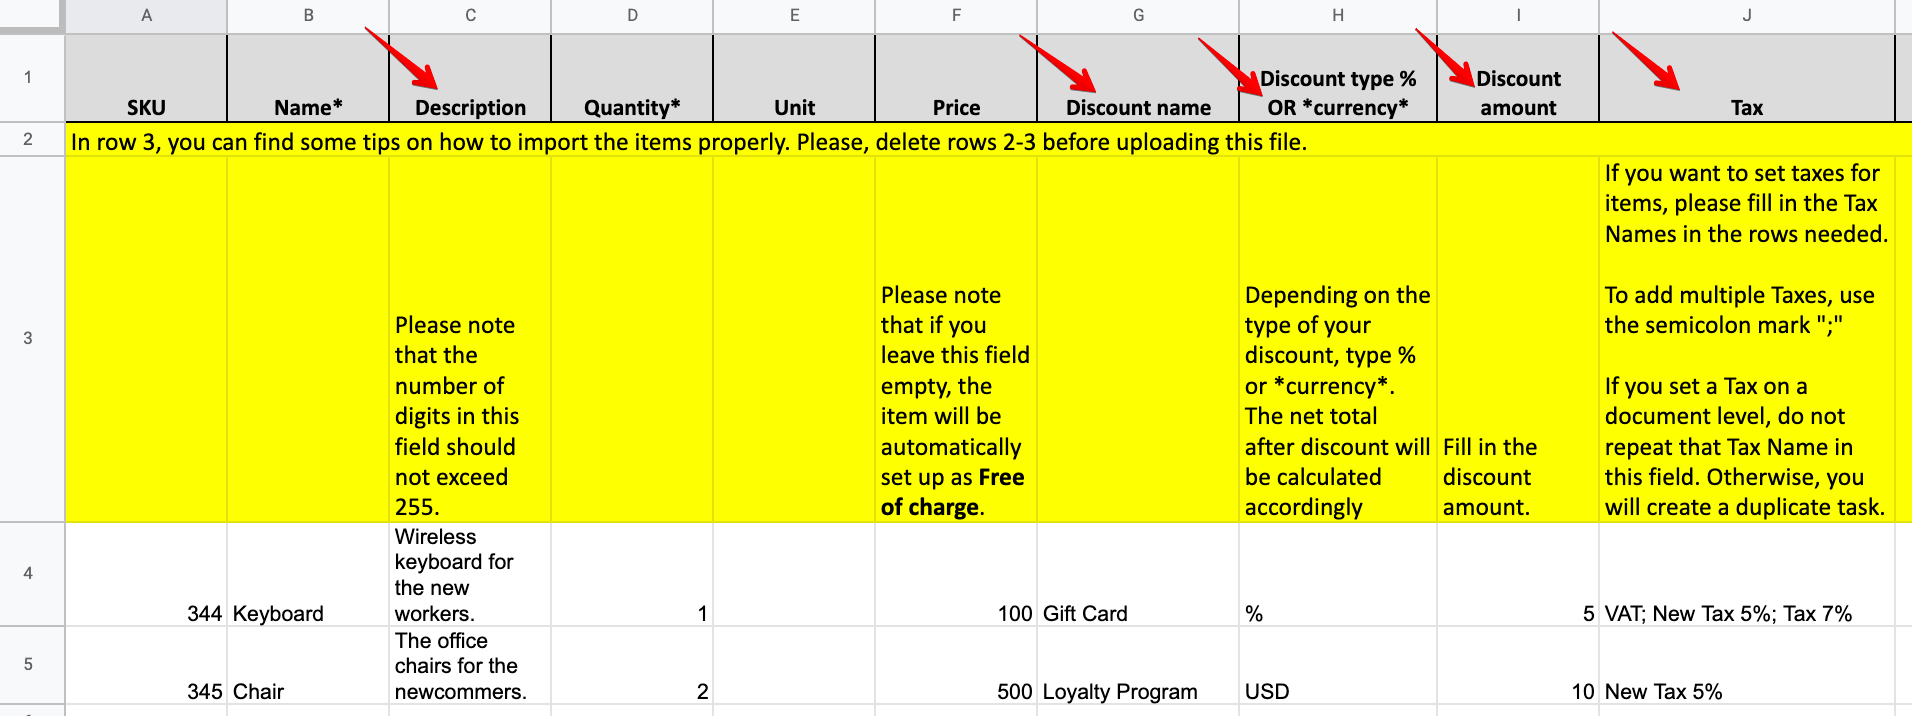
- Description — allows you to add a text description to the item of up to 255 characters.
- Discount — allows you to specify a Discount Name, Discount Amount, and Discount Type.
In the Discount Type field, you can choose whether a discount will be in a percentage (%) or in a certain amount (USD, EUR, etc.). It works like this:
- If you select the percentage type and input "5" as the amount, 5% will be deducted from the total amount.
- If you select the amount type and input "5" as the amount, then 5 USD, EUR, or any other selected currency will be deducted from the total amount.
- Tax — allows you to incorporate taxes into the items. Please note that the name of the added tax should be identical to the one in Precoro. How it works:
- List multiple tax categories by putting a ; after each one.
- If you already established tax for the overall document, do not repeat the tax here. Otherwise there will be a duplicate tax.
New feature: Delivery Date filled in automatically
The Precoro team knows how valuable your time is and we continuously strive to take the hassle of routine work out of your day to let you focus on important tasks.
The Delivery Date information will automatically be filled in for Requests for Proposals (PFP) and Purchase Orders (PO) according to the information in the corresponding Purchase Requisitions (PR). This way, you don't have to go back to the related PRs to search for the necessary data.
Let's see how it works:
Delivery Date automatically filled in for Requests for Proposals
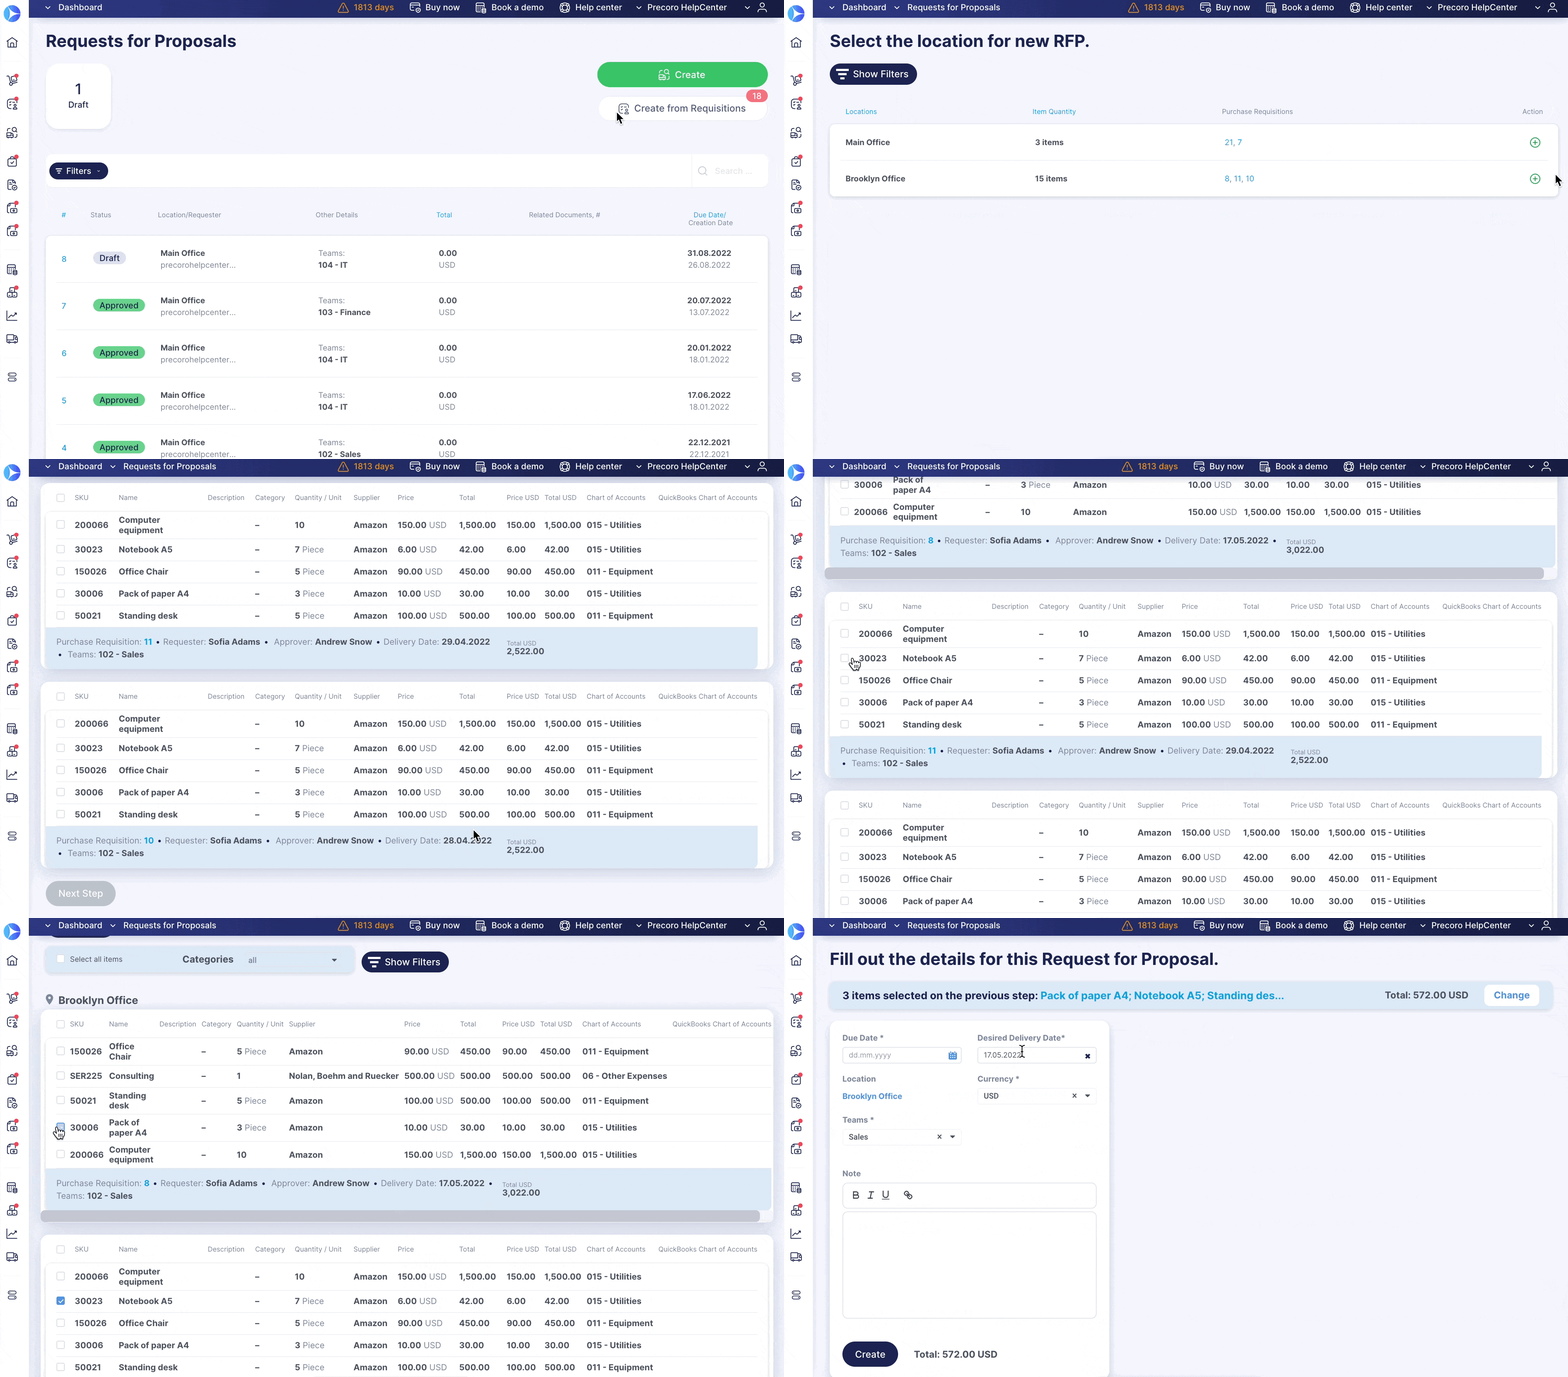
When creating Requests for Proposals from Purchase Requisitions, the Desired Delivery Date field will be automatically filled with information from the Delivery Date field in PR.
- If you create an RFP from one PR document, the Desired Delivery Date will automatically be filled in with the exact PR Delivery Date.
- If you create an RFP from several PR documents, the Desired Delivery Date will be automatically filled in with the latest Delivery Date from the selected PRs.
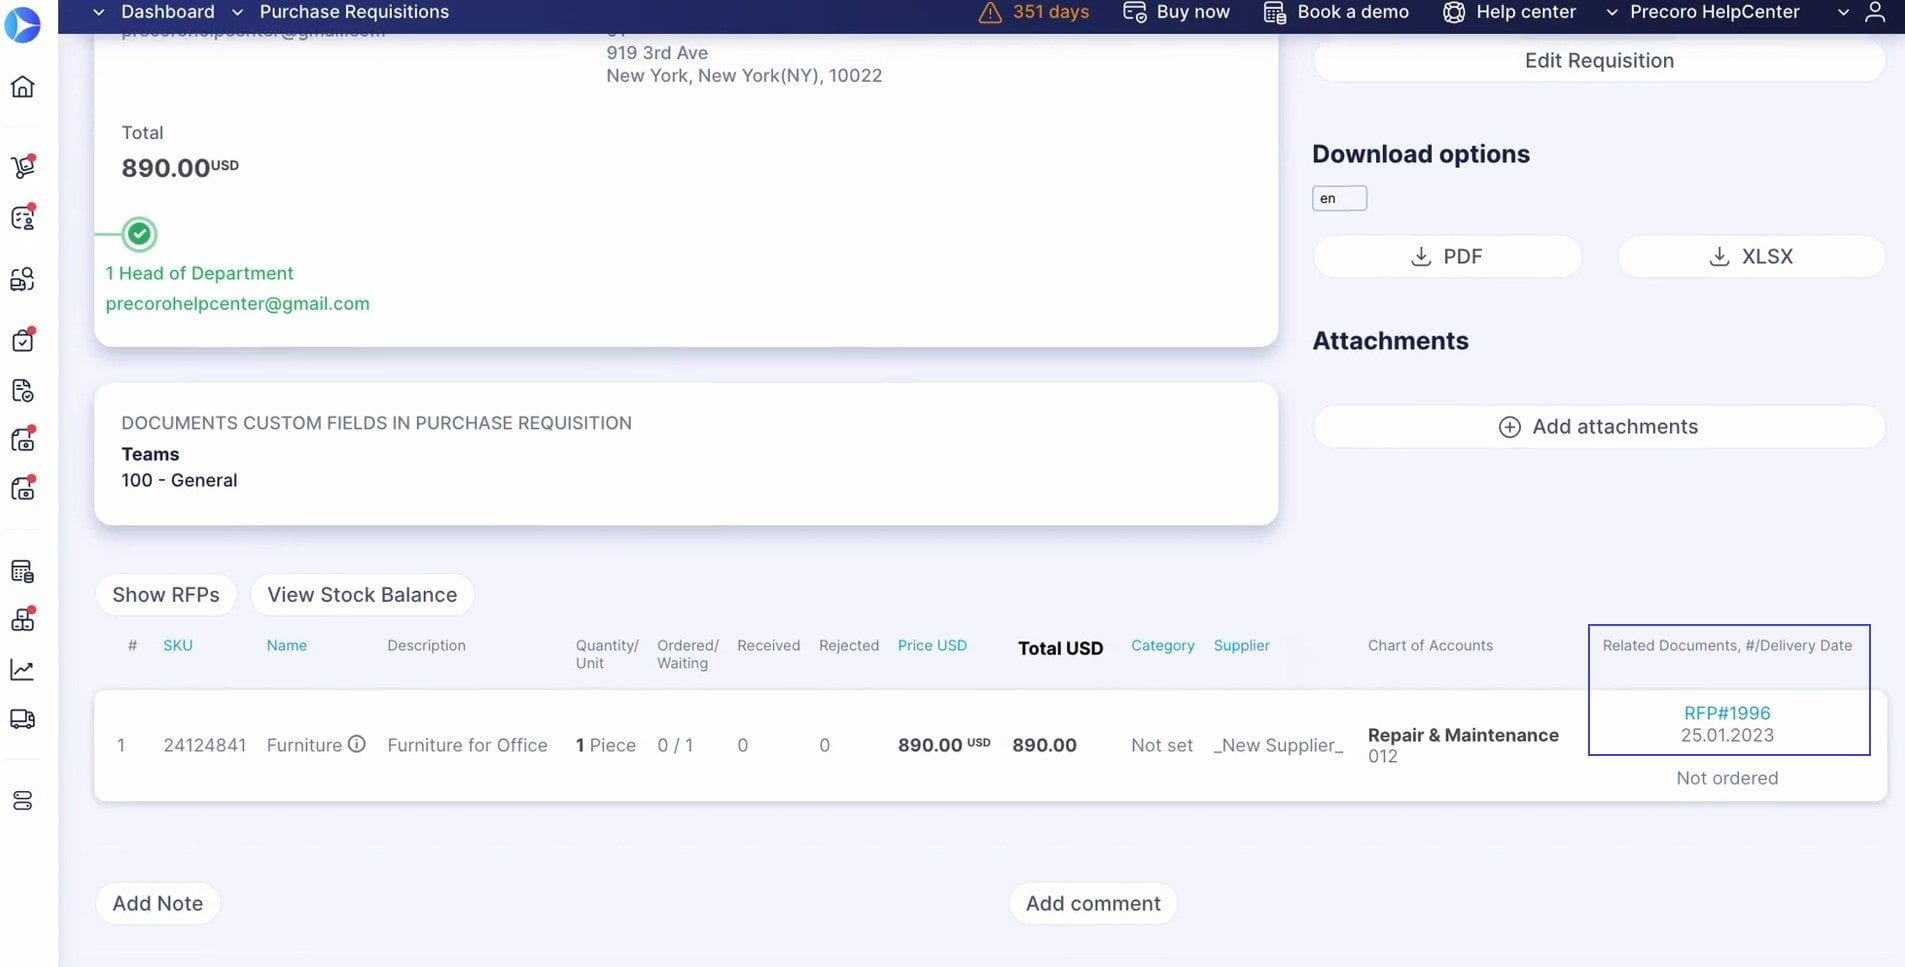
After selecting suppliers for certain products, the Delivery Dates from winning suppliers will be automatically transferred to the Related Documents/Delivery Date column in PR items.
Delivery Date automatically filled in for Purchase Orders
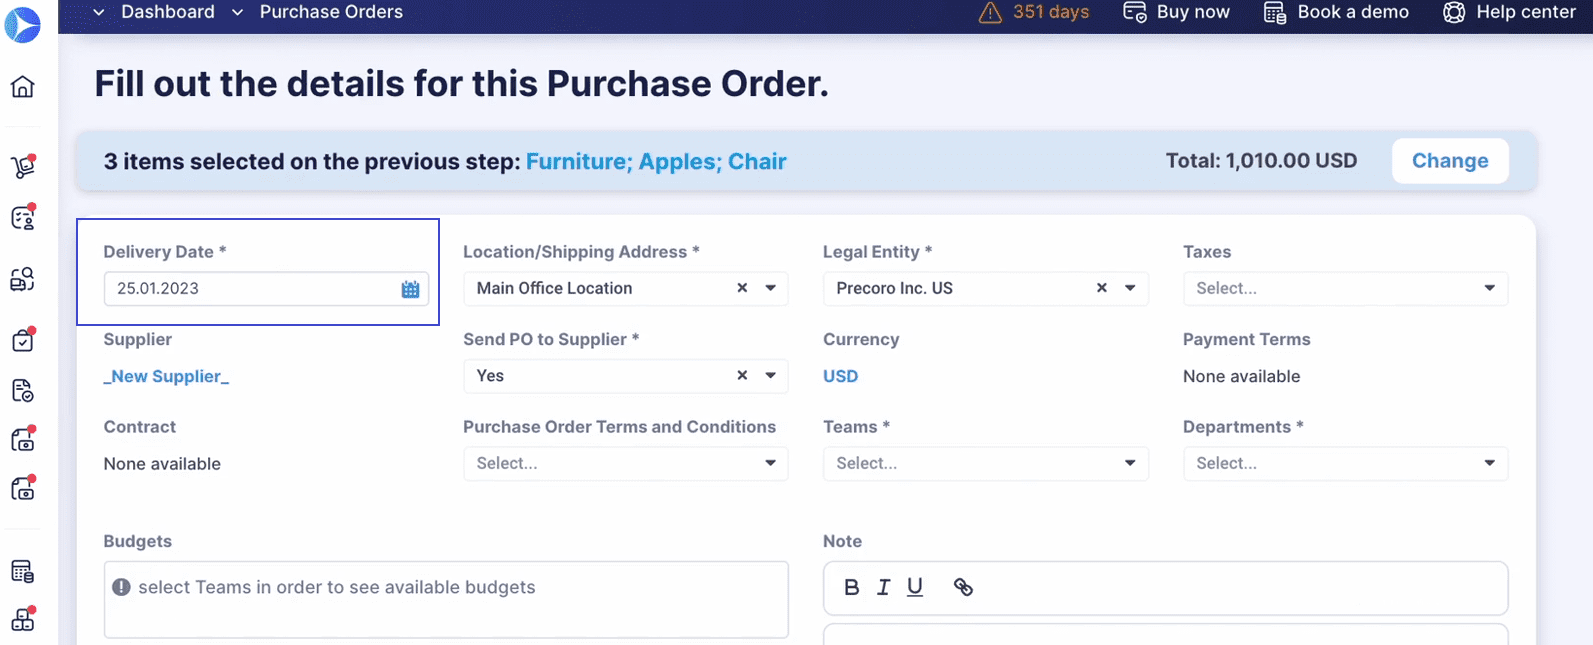
When you create Purchase Orders from Requisitions, the Delivery Date for the selected items will be automatically filled in:
- If you create a Purchase Order from Purchase Requisition, the Delivery Date from the Related Documents/Delivery Date column in the item line will be automatically filled in. Please note that this applies only to Purchase Requisitions with related Requests for Proposal documents.
- If you create a Purchase Order from a Request for Proposal, then the Delivery Date item line field will be filled in with the Delivery Date set by the supplier (it won't be taken from the Desired Delivery Date in the Request for Proposal).
Easily distinguish users by Power/Standard statuses
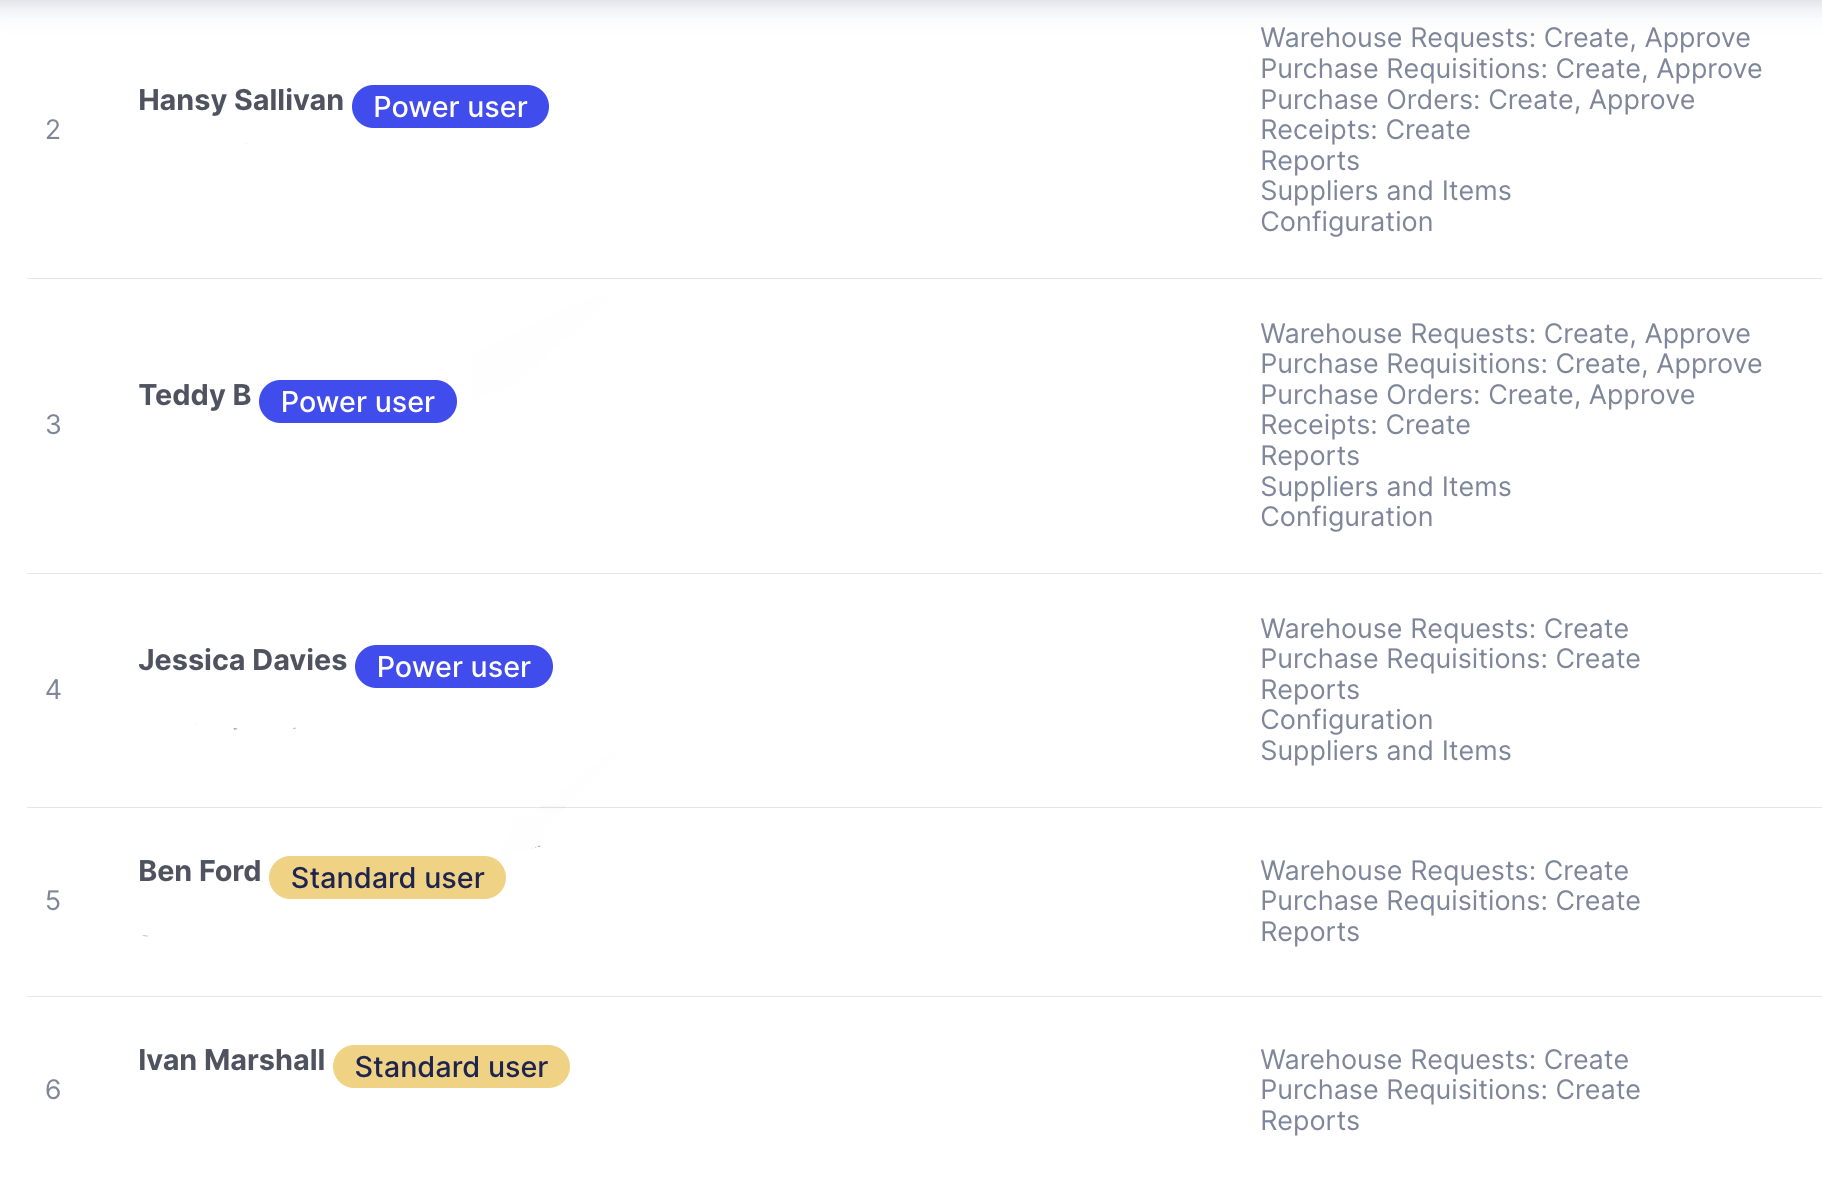
When editing roles on the User Management page, companies with either the Power or Standard plan will now see one of two statuses next to each username — Power user or Standard user.
The new feature will make it easy to quickly differentiate between the users' responsibilities in Precoro.
The Power roles include:
- Approve (all modules)
- View only (all modules)
- Configuration
- Supplier management
- Warehouse management
- Budgets
The Standard roles include Create, Pay, and Reports roles.
Please note that this update won't affect companies that use the Basic plan.
Changes to field and column names
All Invoices → Total Invoiced
We renamed the All Invoices column in Blanket Purchase Orders to Total Invoiced.
The meaning of the column remains the same — it shows the sum of invoices created for a certain item line in a Blanket Purchase Order.
Please note that the Total Invoiced column is available only in the Blanket Purchase Order per item type.

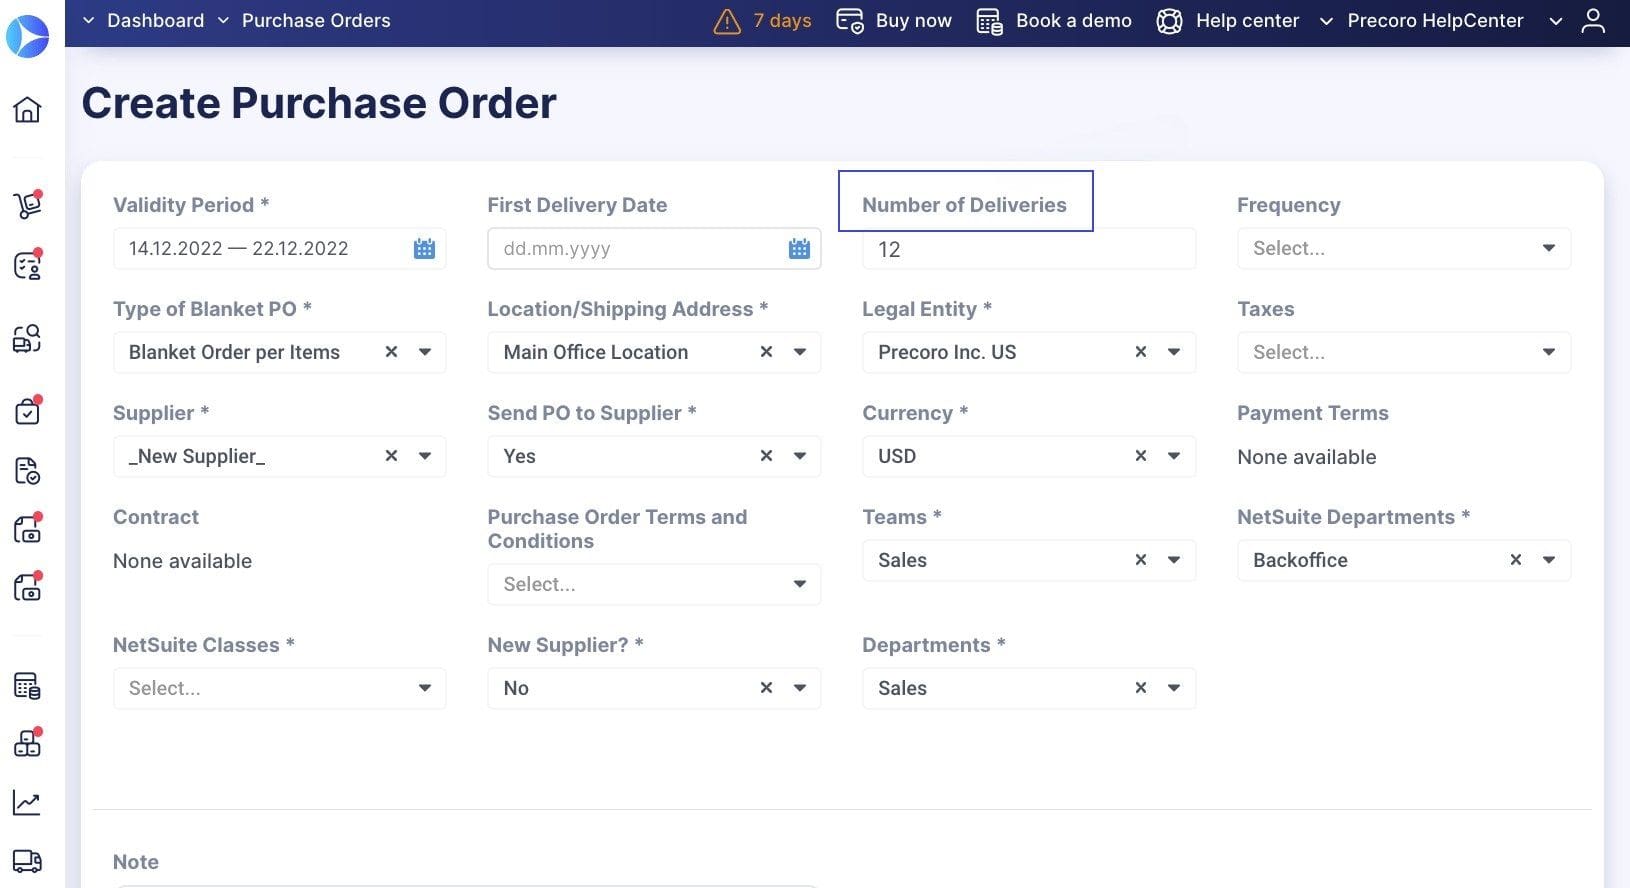
Amount of Deliveries → Number of Deliveries
When creating the Blanket Purchase Order, please note that the Amount of Deliveries field has been renamed to Number of Deliveries.
The meaning of the field hasn't changed — Number of Deliveries still shows the number of deliveries you are expecting to receive from a particular supplier.
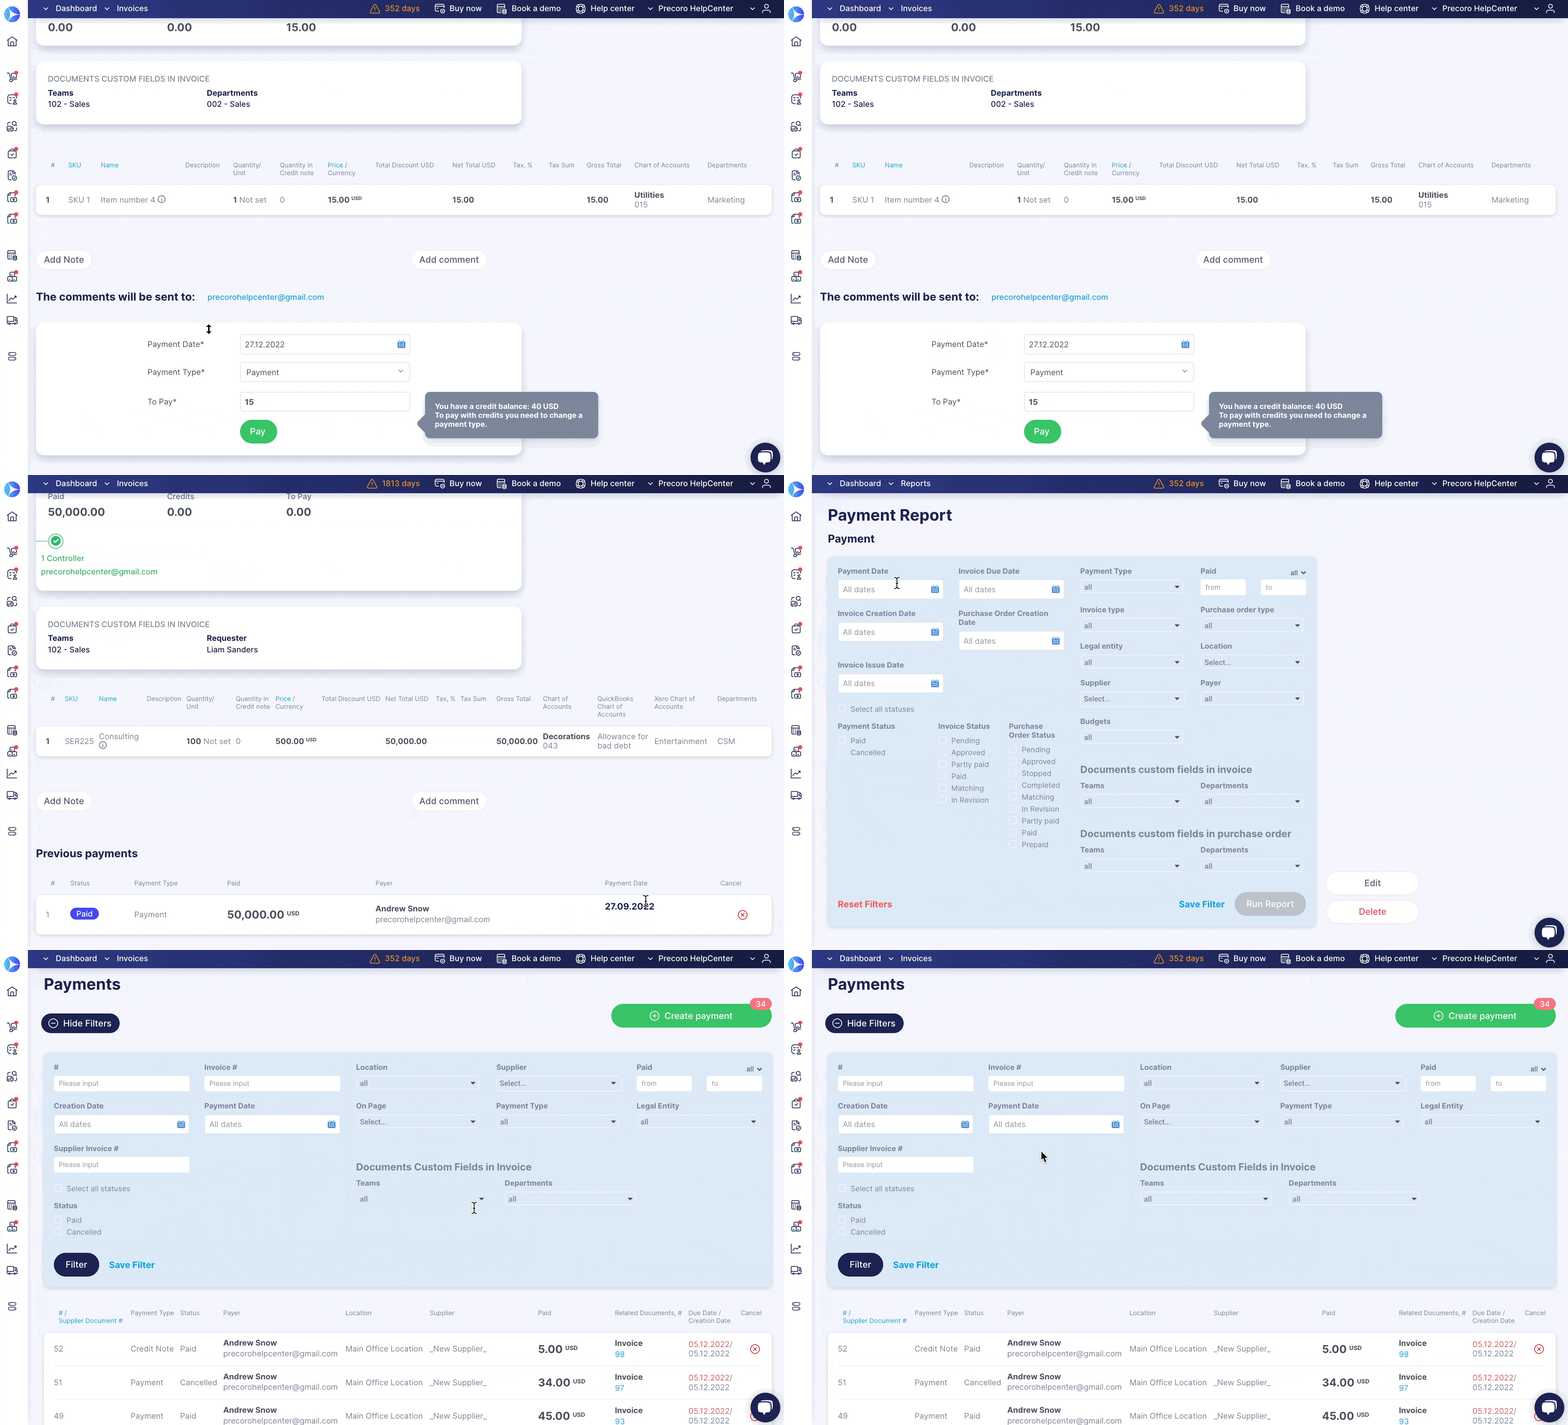
Due Date → Payment Date
The Due Date field on the payment-related pages has been renamed to Payment Date.
This was the last product update of 2022. Stay with us to see what new features and improvements the Precoro team is preparing for you in 2023.
The best is yet to come 😉.


