
5 min read
Product Update, August 2024
🍂 Discover Precoro’s latest updates: auto-transfer budget amounts to future periods, create custom service and purchase orders from PRs, and more!
Precoro presents our latest series of product updates. Please feel free to explore at your leisure or navigate directly to the updates that most interest you:
- Easily transfer unspent budget amounts to future periods
- Automatically calculate invoice due dates based on payment terms
- Effortlessly create custom orders from requisitions
- Simplify document numbering with unique legal entity codes
- Improved notifications for QuickBooks integration disconnections
- New Shipping item type
- Suppliers and Items View Only role
- Simplify approvals with the auto-approve feature for recurring documents
- OCR improvements
Easily transfer unspent budget amounts to future periods
Streamline your budget management by eliminating manual transfers of unspent amounts between budget periods. Now you can automate this process with just a few simple steps.
Here is how to enable the feature:
- Open a budget with at least two periods and click Edit.
- Check the "Auto transfer of unspent amount" box.
- Enter the desired number of days for the transfer to occur after the current budget period ends (up to 28 days). Make sure this number doesn’t exceed the End Date of the next budget period.
- Review your settings and save.
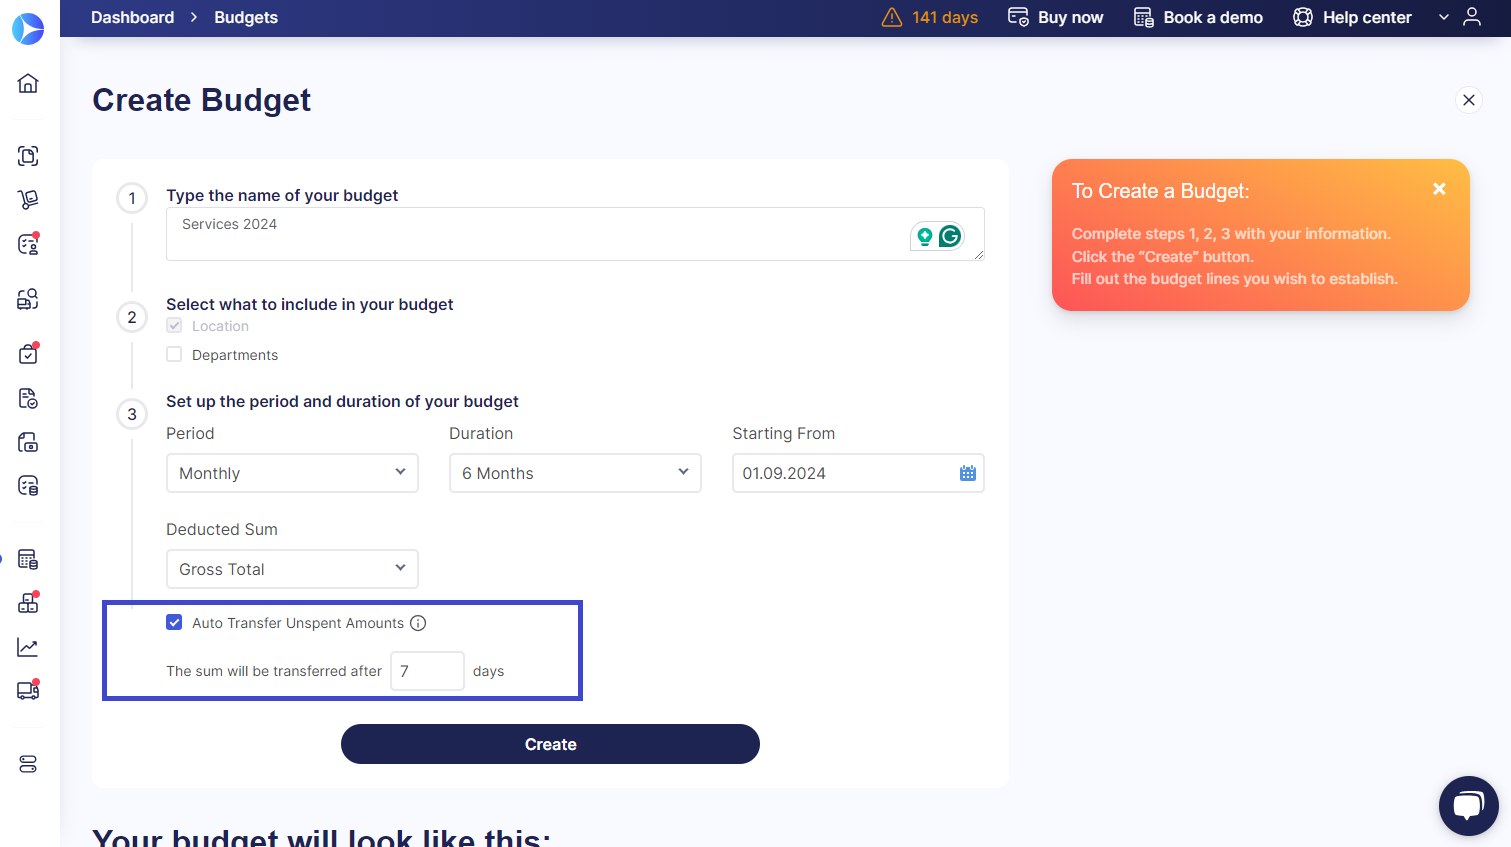
The transfer will now happen automatically, according to your specified timeframe.
Automatically calculate invoice due dates based on payment terms
Simplify your invoicing process with automated due date calculations. When creating an invoice — whether from scratch or from a PO — Precoro automatically sets the due date based on the invoice issue date, supplier, and selected payment terms.
We’ve also simplified the layout. Now, Issue/Due Date for invoices and Delivery Date for purchase orders are displayed closer to the Payment Terms for easier setup.
When setting up or editing Payment Terms, you’ll define the number of days before payment is due:
- For “Due by a certain date of this month” or “Due by a certain date of the next month,” enter a number between 0 and 31.
- For “Due in a fixed number of days,” enter any number greater than zero.
📖 For more detailed instructions, refer to our Payment Terms Management and Accounts Payable Setup guides.
Effortlessly create custom orders from requisitions
Accelerate your order processing by generating custom service orders and custom purchase orders directly from requisitions.
Here is how to create the documents:
- Navigate to the Purchase Order management page;
- Click on the "From Requisitions" button;
- Choose your custom form;
- Select the supplier and add items to the document.
Simplify document numbering with unique legal entity codes
We’ve added a Unique Code field in the Legal Entity section, allowing you to create a custom code with digits and characters. This code can now be included in the Custom Numbering for your documents.
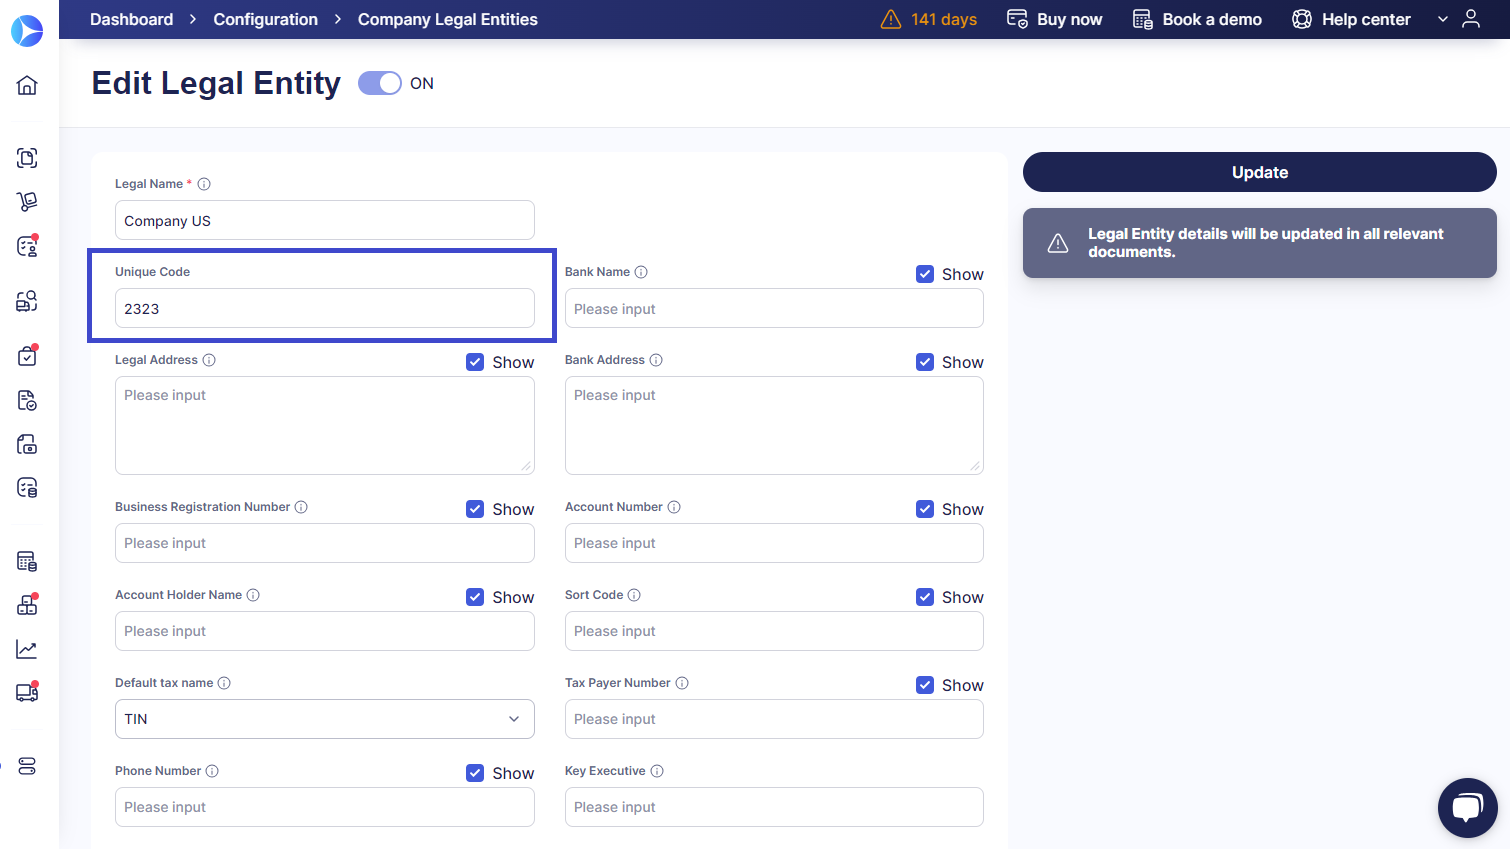
To incorporate the Unique Code into your document numbering, contact our Support Team for setup. You can also use filters to search for entities by their Unique Code.
Improved notifications for QuickBooks integration disconnections
We’ve enhanced our notification system to better inform you of QuickBooks integration issues.
A new email notification option is now available under Email Preferences. When enabled, users with Configuration roles in Precoro will receive alerts if any of the following issues occur:
- QuickBooks subscription is transferred to another user.
- QuickBooks subscription is canceled or expired.
- QuickBooks admin is removed from your organization.
These notifications will prompt administrators to resolve the issue and re-establish the integration. Until resolved, your company’s documents, suppliers, items, and tracking categories will not be created or updated.
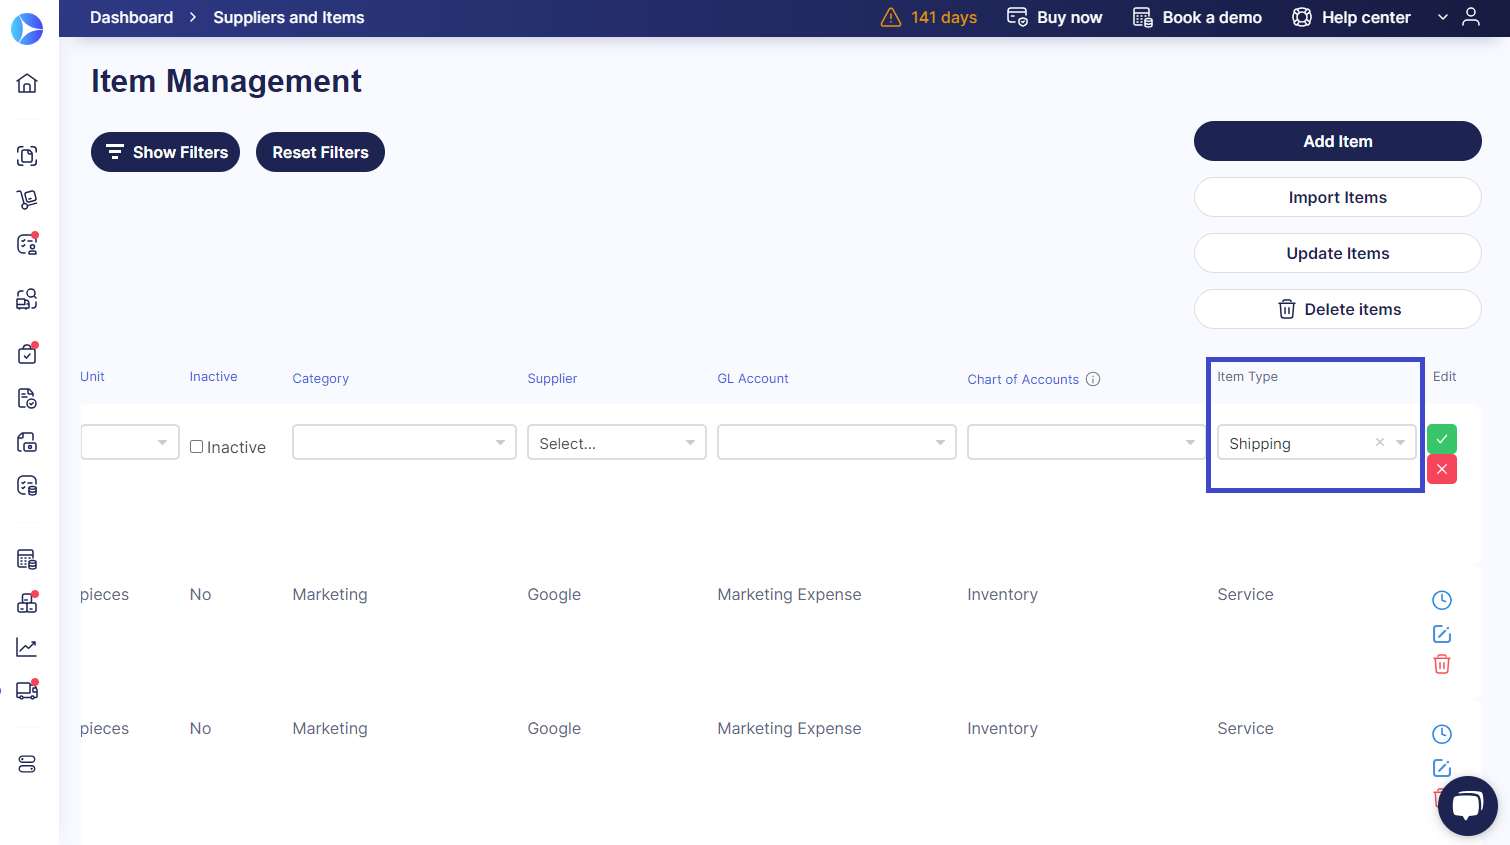
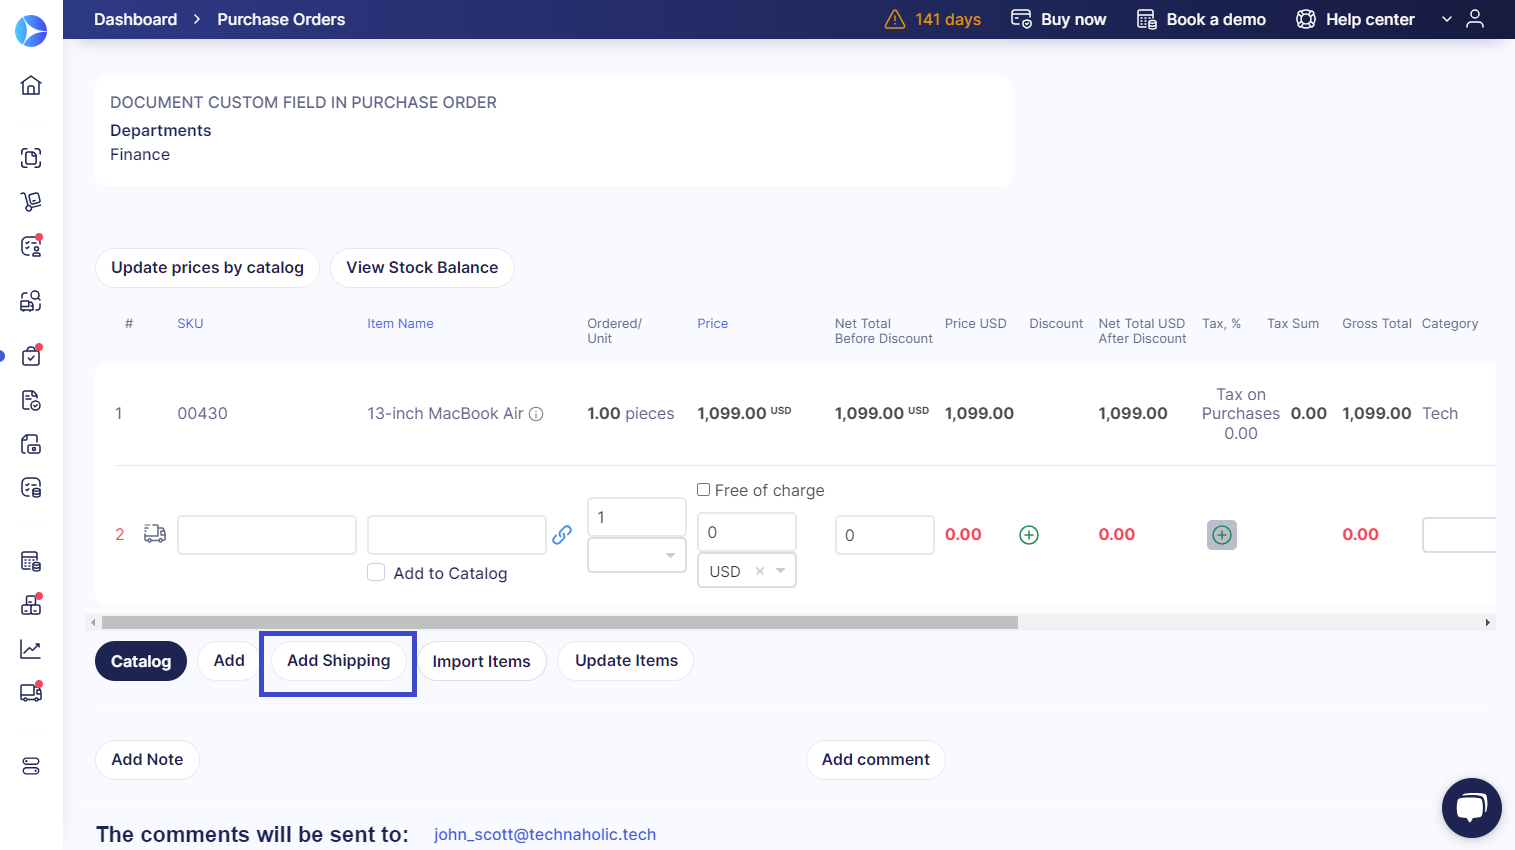
New Shipping item type
Managing logistics costs is now simpler with the new Shipping item type. You can easily add shipping costs to documents without triggering approval or matching processes.
Shipping items don’t require tax calculations, so the “Tax %” and “Tax Sum” columns will remain empty. They also don’t need to be received, which means they’re excluded from receipt lists.
You can create new Shipping items in two ways:
- On the Item Management page, click Add Item, choose "Shipping" as the Item Type, and save. This item can then be added to documents via the Catalog.
- Alternatively, click "Add Shipping" within a document (works for invoices, POs, and custom forms). You can add unlimited Shipping items or create a document with only these items.
📖 For more information, please visit the article on our Knowledge Base.
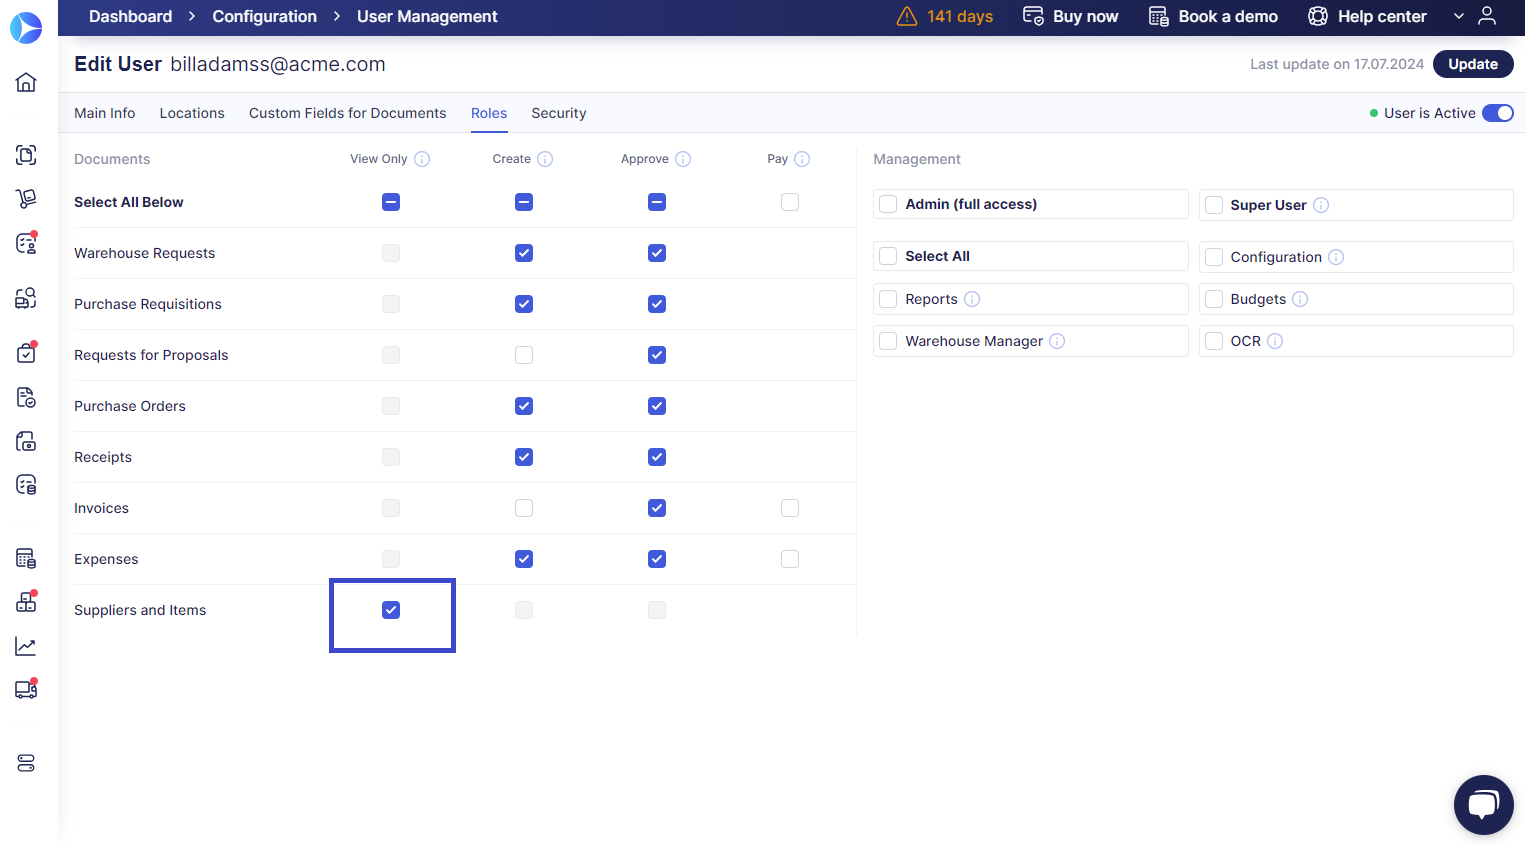
Suppliers and Items View Only role
Enhance privacy by limiting how users interact with suppliers. Now you can enable the View Only role for the Suppliers and Items module.
In short, here is what this role allows users to do:
- View all suppliers, their invitations, questionnaires, and detailed profiles, including attachments.
- Access the items list and Revision History.
- See relevant info cards for suppliers and items.
- View Supplier Custom Fields.
📖 To learn more about this update, please refer to our Knowledge Base article.
Simplify approvals with the auto-approve feature for recurring documents
Effortlessly handle recurring documents with our new feature that automatically approves future POs and invoices when the original document is approved.
To set it up, go to Configurations → Approval → Auto-Approve Subsequent Recurring Documents, and choose your conditions for automatic approval. Once configured, documents will be approved automatically and you will also receive notes about the auto-approval.
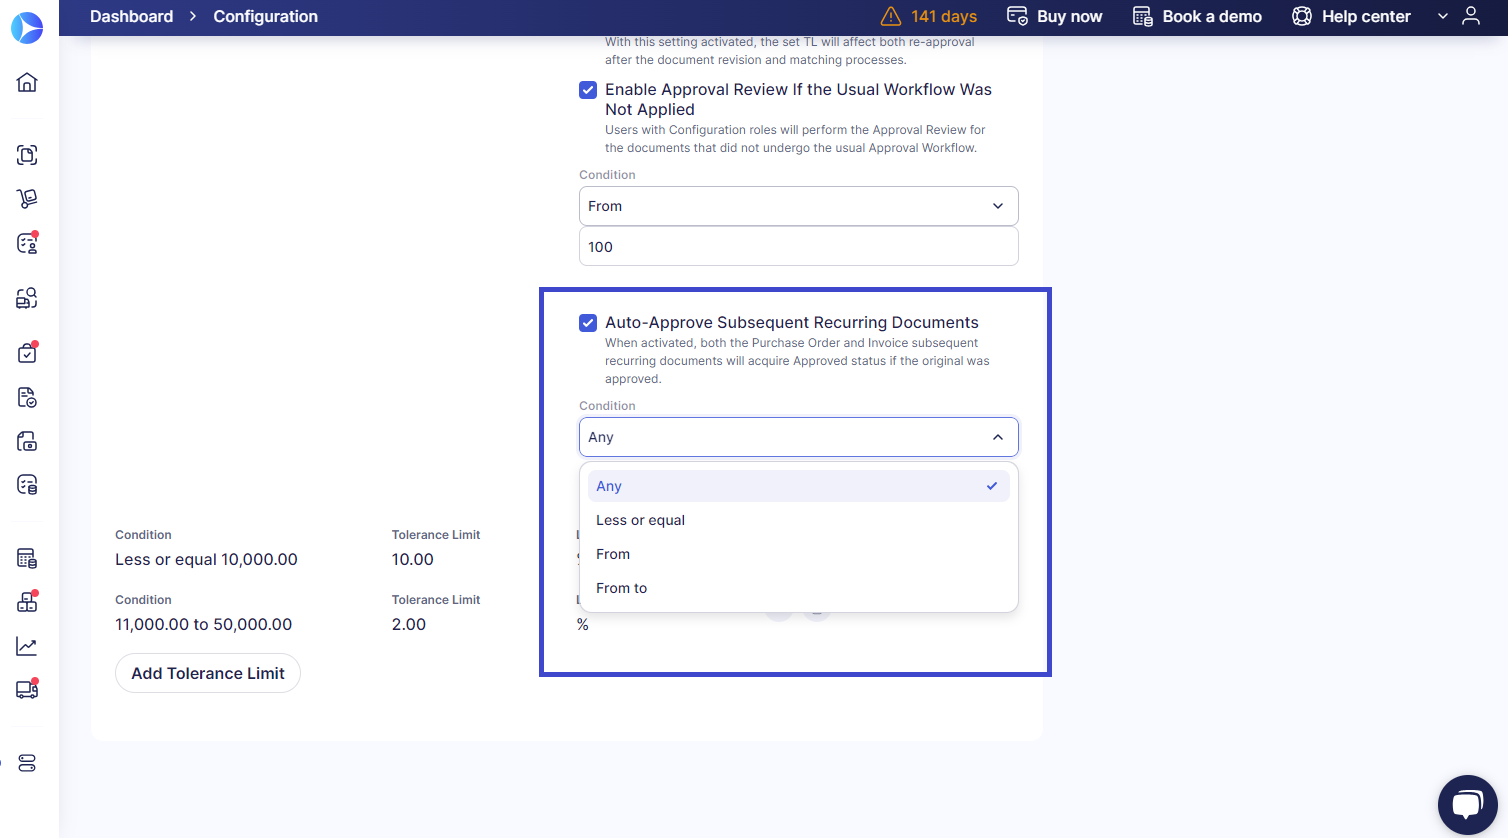
💡 Please note that adding new approval steps or making significant changes (e.g., to Total or Budget) will require re-approval of that document. Subsequent documents created from this will not require additional approval and will be automatically approved. Additionally, if the document is altered by a Super User, it won't require a re-approval.
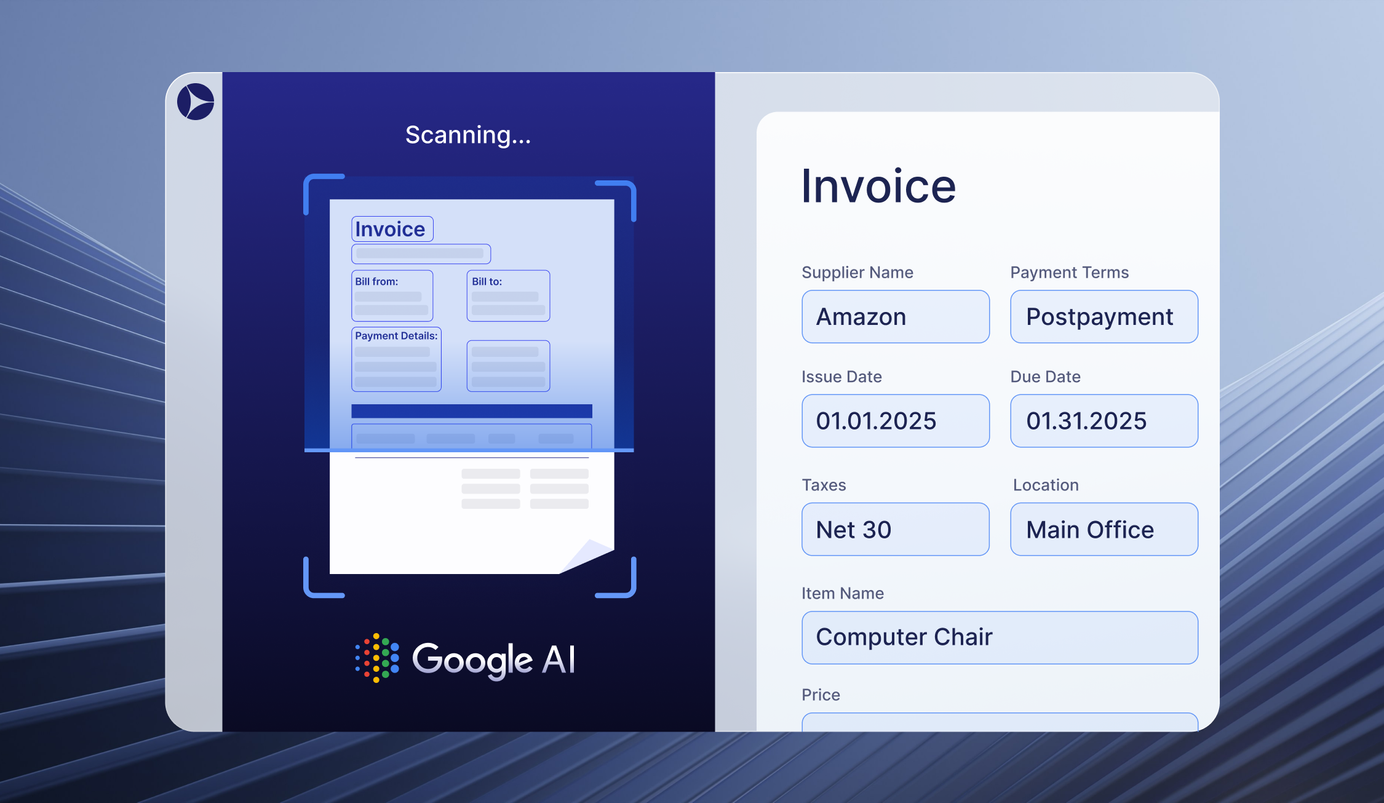
OCR improvements
Easily identify duplicate documents
Save time and prevent errors with our new feature that visually highlights potential duplicate documents in the AP Inbox. Text prompts will also inform you of which specific values appear to be duplicated.
The system checks for duplicates when a document enters Draft status, but you can still proceed with creating documents.
To view more details on the duplicated values, just click the Duplicated status in the document.
Automatically identify shipping items in documents
Simplify document processing with automatic identification of Shipping items. When OCR scans your documents, it recognizes keywords like "Shipping," "Delivery fee," and "Freight amount" to label these items correctly.
Here’s how it works:
- Upload your document for OCR recognition.
- The OCR system identifies the Shipping item line.
- Precoro checks if the item already exists in your catalog. If it does, it’s mapped accordingly; if not, the item is labeled as Shipping.
📖 To learn more about this feature, please follow the link to our Knowledge Base.


